Path of Glouphrie, The
Quest Details
| Difficulty | Experienced |
|---|---|
| Type | Quest |
| Length | Medium |
| Quest Points | 1 |
| Members | Yes |
Start Point
Requirements
Skill Requirements
Quest Requirements
Quests Unlocked/Partially Unlocked by Completing This Quest
Items Needed
Items Acquired During Quest
Walkthrough
-
Make your way through the maze to the center of the Tree Gnome Village (use the map below). When you have made it through, squeeze through the loose railing and talk to King Bolren about his pet Dumpling. You will not succeed in convincing the king that his little pet is evil. He will then tell you that he will only believe you if you can remove the so-called illusion. The king then recommends that you look underground for a local gnome who might be able to help you locate the anti-illusion device and the elven artifact.
Note: The easiest way to reach the center of the Tree Gnome Village is by using the Spirit Tree transportation system (requires completion of the Tree Gnome Village quest).
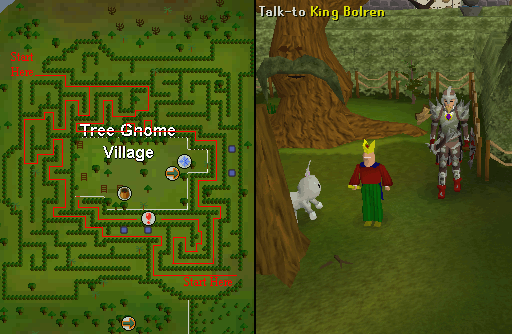 Image last updated: Sep 01, 2022 Update Image?
-
Squeeze through the loose railing to the southwest and climb down the ladder to the east.
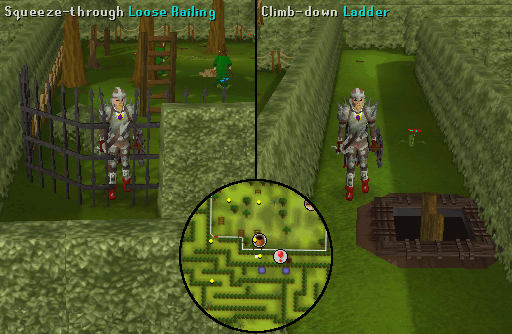 Image last updated: Sep 01, 2022 Update Image?
-
Go to the room to the west and talk to Golrie about the anti-illusion device and the elven artifact needed to operate it. He will tell you about his grandfather's love of collecting Elven artifacts, and how he used to send him souvenirs, which he keeps in a strongroom on the other side of the cave.
Note: Beware of the Zombies (level 18), Zombies (level 42), Hobgoblins (level 40), and Giant bats (level 64) in the dungeon.
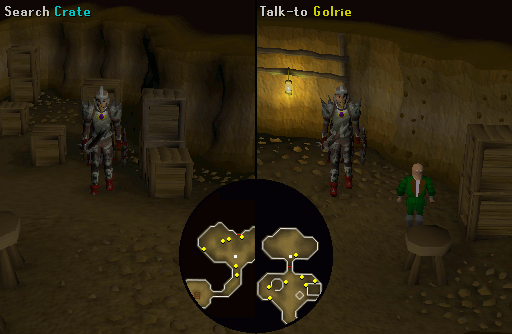 Image last updated: Sep 01, 2022 Update Image?
-
Head to the room to the east and crawl into the tunnel. Once on the other side, push the big monolith to proceed further into the strongroom. Open the nearby chest and search it to find 3 color shaped crystals.
Note: If you leave the dungeon or log out at any time, the monoliths will be moved back to their original location and you will have to push them out of the way again.
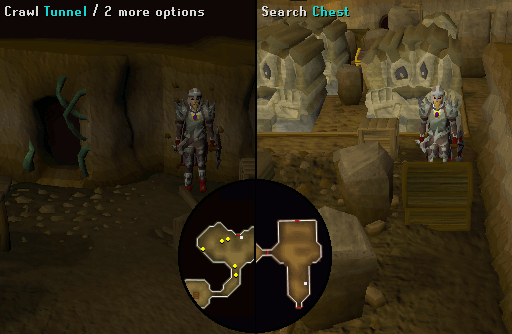 Image last updated: Sep 01, 2022 Update Image?
-
Proceed to the next set of monoliths. Push the big monolith on the left one space to the north and then push the big monolith above it one space to the east. Search the two chests in the area to the north to obtain A key to a chest, Yewnock's notes, and some more color shaped crystals.
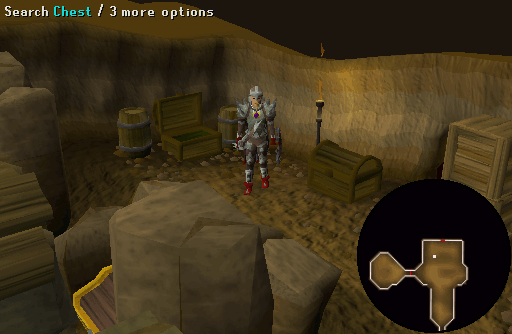 Image last updated: Sep 01, 2022 Update Image?
-
Now, push the small monolith one space to the south, and then push the big monolith to its left one space west. Use the key you just acquired on the mahogany chest to receive a Strongroom key. Take a few steps southeast to a singing bowl and use its sing-glass option to turn the Small crystal seed into a Crystal chime.
Note: If you brought a Crystal saw instead of the seed, then use the bowl's revert-crystal option to revert it back to a Small crystal seed.
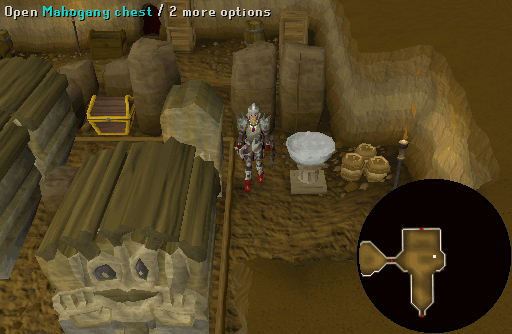 Image last updated: Sep 01, 2022 Update Image?
-
Push the southeastern big monolith one space to the west and use the Strongroom key on the gate. You will enter the area that contains Yewnock's Anti-Illusion device. Read the lectern in the corner containing Bolrie's diary. Cut scenes will occur giving more background information about the Gnome Kingdom.
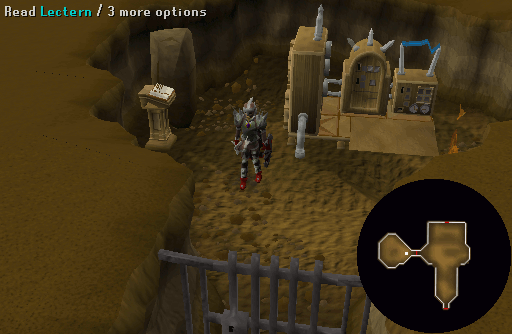 Image last updated: Sep 01, 2022 Update Image?
-
Now, it is time to unlock the machine. The machine operates similarly to Oaknock's machine from The Eyes of Glouphrie quest. The lock is based on numbers and shapes. Your goal is to insert crystals into the machine so that they equal the value of the displayed crystal (see the table below). For example, if the crystal you need is a green pentagon and there are two crystal slots, then you would need to put a red and a yellow pentagon in the machine. If you do not have the required crystal, you may use the exchanger to the right to convert high numbered crystals into multiple lower numbered ones. You can also exchange a couple of low value crystals to get a few higher valued crystals. When you have unlocked it, a cut scene will occur of Dumpling's de-masking and King Bolren admitting that you were right.
Note: The crystals in the device differ from player to player.Crystal Color Number Values Circle Triangle Square Pentagon Red 1 3 4 5 Orange 2 6 8 10 Yellow 3 9 12 15 Green 4 12 16 20 Blue 5 15 20 25 Indigo 6 18 24 30 Violet 7 21 28 35
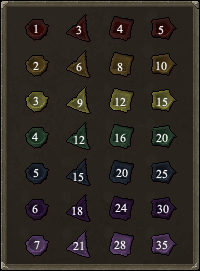 Image last updated: Sep 01, 2022 Update Image?
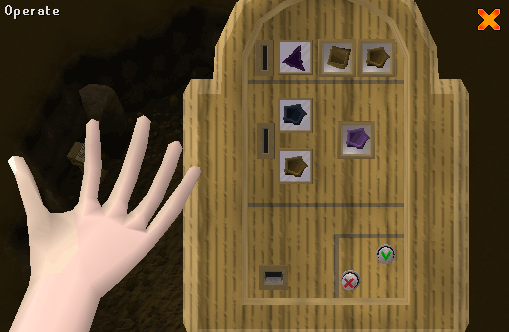 Image last updated: Sep 01, 2022 Update Image?
-
Report back to King Bolren at the Tree Gnome Village and he will ask you to kill his pet. Kill the evil creature and talk to the king again. He will tell you that one of his citizens, Longramble, went looking for the hidden city of Arposandra. King Bolren has no idea where Longramble or the city is and therefore sends you to Gianne Jnr, in the Tree Gnome Stronghold, who might be able to help you.
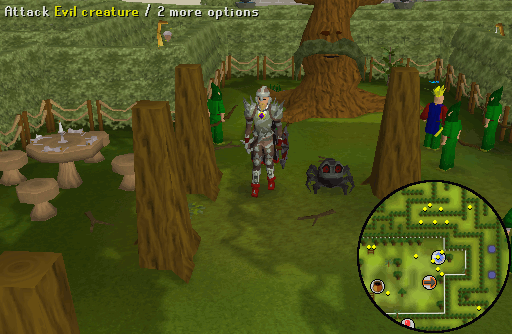 Image last updated: Sep 01, 2022 Update Image?
-
Travel to the Tree Gnome Stronghold and talk to Gianne Jnr about Longramble the explorer. He is on the far west side of the second floor in the Grand Tree. He will tell you that he has a long-standing order for Longramble, and that all the gnomes that he has sent cannot get him. He will tell you the co-ordinates of his whereabouts, which are: 2 degrees, 7 minutes south; 3 degrees, 7 minutes west.
Note: The easiest way to reach the center of the Tree Gnome Stronghold is by using the Spirit Tree transportation system (requires completion of the Tree Gnome Village quest).
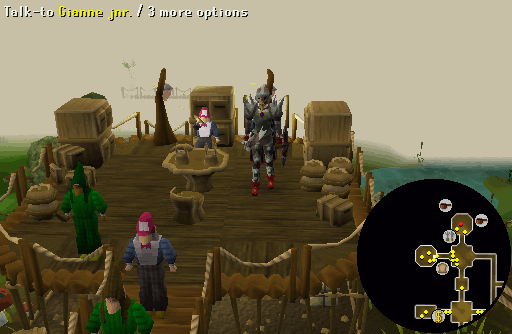 Image last updated: Sep 01, 2022 Update Image?
-
Prepare yourself for the battle with three level 118 Warped terrorbirds and travel to the swamp just south-west of the Castle Wars Arena. When you have reached the swamp, head west until you see a tree that you can grapple to. Use your crossbow and Mith grapple to get across.
Note: The easiest way to reach the Castle Wars Arena is by using a Ring of duelling teleport or by using the Hot Air Balloon transportation system (requires completion of the Enlightened Journey quest).
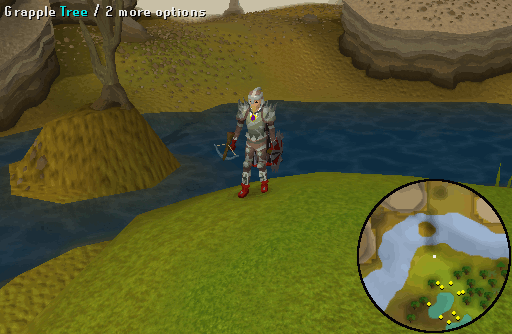 Image last updated: Sep 01, 2022 Update Image?
-
When you have made it across, talk to Longramble. He will tell you that he has discovered a waste outlet that he believes is coming from Arposandra. He will then inform you that it is being patrolled by a creature that suggests gnomish involvement and that its entrance is blocked by some roots.
Note: If you give Longramble Tangled toad's legs, he will give you a Mint cake.
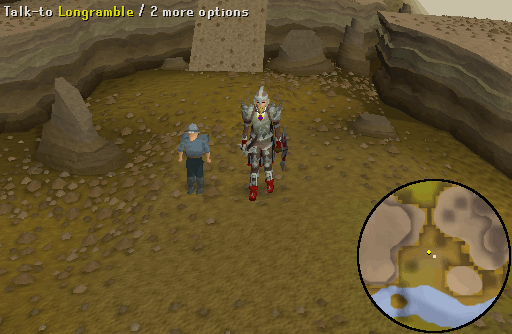 Image last updated: Sep 01, 2022 Update Image?
-
Head north until you come to a dying spirit tree. Talk to it and you will find out that it is spiritually poisoned. Hazelmere will then magically tell you that you need to perform a elven chant in order to cleanse the tree. Ring the Crystal chime, which will cleanse the tree. Now, you will be able to enter the sewer and use the tree's teleport abilities.
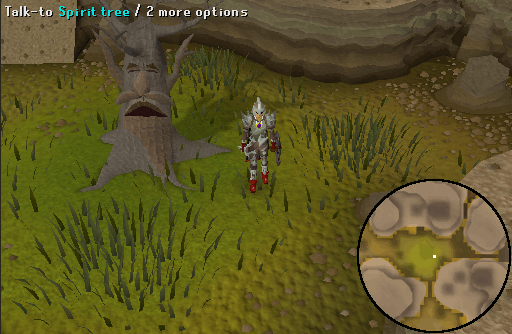 Image last updated: Sep 01, 2022 Update Image?
-
Go west around the corner from the Spirit Tree and enter the sewer and climb up the ladder on the northern wall.
 Image last updated: Sep 01, 2022 Update Image?
Head east past the metal doors until you come to another ladder. Climb down it and up another ladder to the north. Go all the way west until you come to some metal doors. Go through and down the northwestern ladder. Climb up the northeastern ladder and continue north until you come to a four way intersection.
Note: Beware of the aggressive Warped terrorbird (level 118) in the dungeon. It is therefore advised that you turn on Protect from Range when making your way through the dungeon.
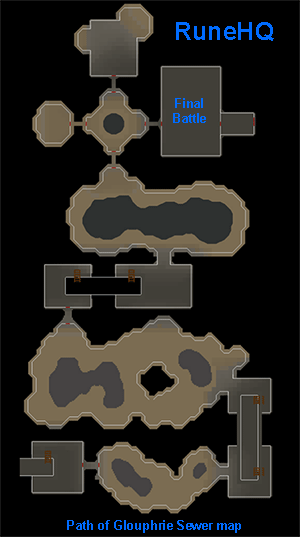 Image last updated: Sep 01, 2022 Update Image?
Click image to Enlarge!
-
Turn on Protect from Ranged and enter the room to the east, containing 3 Warped terrorbirds (level 118). Use the Crystal chime on them to weaken them, making them vulnerable to your attacks. The effect of the Crystal chime only lasts for about 30 seconds, after which you will have to use it on them again. Even though Warped terrorbirds use both melee and ranged attacks, it is advised that you turn on Protect from Ranged since it's their most powerful method of attack. The area near the entrance and the pillars in the room can be used to trap the Warped terrorbirds so that only one will be able to attack you.
Note: You cannot teleport out of the room. If you wish to escape, simply leave the room through the door. If you leave the room in the middle of the battle, you will have to fight all 3 Warped terrorbirds again.
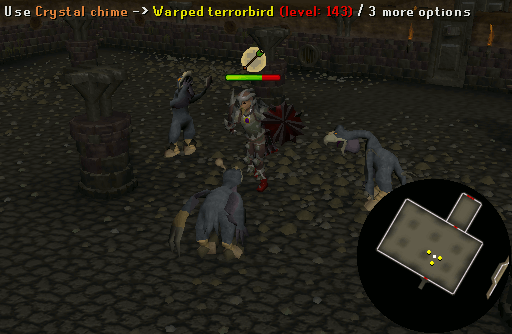 Image last updated: Sep 01, 2022 Update Image?
-
Once you have defeated the terrorbirds, peak through the gate and a cut scene will occur. You will be discovered, and Hazelmere will come to the rescue by teleporting you to his house. Talk to him to receive your reward and learn more about the future.
Congratulations! Quest Complete!
 Image last updated: Sep 01, 2022 Update Image?

Crystal Chime:
During and after the quest, the Small crystal seed can also be turned into a Crystal chime by selecting the sing-glass option on the singing bowl in Golrie's cave in the Tree Gnome Village Maze dungeon. If you lose your seed or chime, you can retrieve another seed by talking to Brimstail. Warped tortoises and Warped terrorbirds are slayer monsters and can not be killed without use of the Crystal chime. If you wish to turn it into a the Crystal saw, you can return to Brimstail's cave at the Tree Gnome Stronghold and use the singing bowl there to revert the Crystal chime back to a Small crystal seed and then turn it into a Crystal saw.
Rewards
Guide Credits & History
| Writers | Belgariad04 |
|---|---|
| Contributors | COYOTE TRACK, Seraphim, Golddust, Im4eversmart, Iriel_Red, Fruitcheese, Atomicfungus, Bectemir, Leontjuh1, Crypto416, Finlandguy, Podgaldo, Axeking187, Jakesterwars, Random605, Amithysia, Ceielo, diamondi3ack, Kitty0333100, Eragon7985, gaurdian852, Hilwin1, Alfawarlord, blondie, 711150, DarkAdvisor, and DylanR |
| First Uploader | Im4eversmart |
| Date Added | Sep 03, 2007 |
| Last Updater | Robbie |
| Last Updated | Sep 01, 2022 |
Guide Feedback
Rate this guide
You can report issues without logging in. Log in to leave ratings and watch pages.
Want to help keep RuneHQ's guides up to date?
We're always looking for knowledgeable players to write, review, and improve our content. Join the team and help thousands of adventurers.