Hero's Welcome
Quest Details
| Difficulty | Experienced |
|---|---|
| Type | Quest |
| Length | Medium |
| Quest Points | 2 |
| Members | Yes |
Start Point
Requirements
Skill Requirements
Quest Requirements
Quests Unlocked/Partially Unlocked by Completing This Quest
Items Needed
Items Acquired During Quest
Anti-dragon shield (with Antifire) or Super antifire, Prayer potions, Games necklace (Or Ferocious ring and Fairy ring alternatives).
Quest Recommendations:
One of a Kind and Ritual of the Mahjarrat
Quest Recommendations:
One of a Kind and Ritual of the Mahjarrat
Walkthrough
-
Speak to Alfrick the Planner or Freya Lune by the pier at the marketplace in Rellekka. They will be having an argument, and suggest you speak to a few people around Rellekka.
Note: The easiest way to reach the Rellekka is by using the Fremennik lodestone.
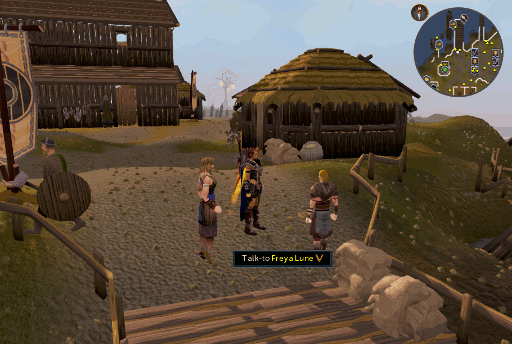 Image last updated: Oct 03, 2019 Update Image?
-
The people are required to talk to can be found within the city.
- Brundt the Chieftan - He will tell you that all the people will welcome V back.
- Manni the Reveller - He will tell you of the victory feast dedicated to V.
- Olaf the Bard - He will tell you of the Battle of the Giant Basilisk.
- Sigmund the Merchant - He will tell you of how V defended the Fremennik.
- Yrsa - She will tell you that V left of his own accord.
- Peer the Seer - She will tell you that V taught the Fremennik how to use magic.
- Swensen the Navigator - He will tell you a story about V fighting foes.
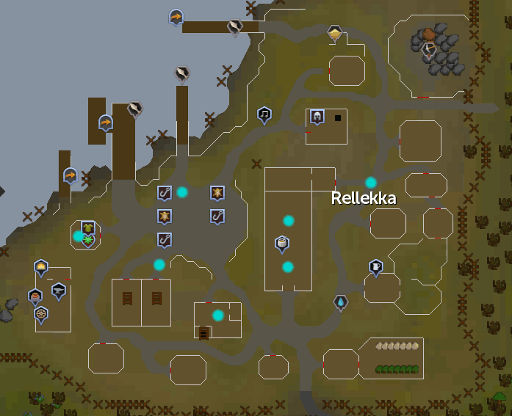 Image last updated: Oct 03, 2019 Update Image?
-
After you have talked to the people above, speak to Alfrick the Planner once more. They will ask the following questions. You must answer them correctly. After answering the questions, you will encounter a cut-scene depicting V returning and the Fremennik rejoicing. However, V wishes to speak to you after the scene ends.
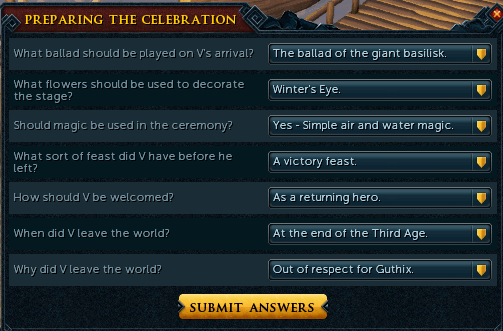 Image last updated: Oct 03, 2019 Update Image?
-
You will wake up hungover inside the cow or chicken pens, return to Alfrick inquire about traveling to the trading post island. Once on the island, enter the dungeon on the northwestern part of the island to find V. V will tell you he is losing his strength and is becoming weak. He will send you to locate sources of energy for him.
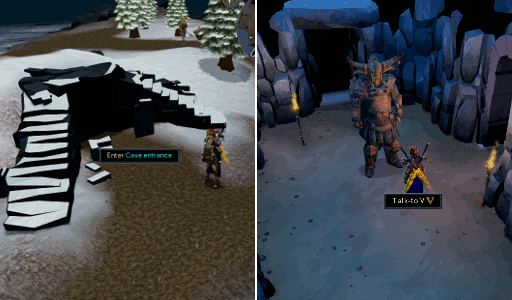 Image last updated: Oct 03, 2019 Update Image?
-
Head back out of the cave and investigate the following. V will arrive to siphon the divine energy from these sources. You must do one item and then do its duplicate, or else it will not work properly, but these pairs can be done in any order.
- Investigate the gnarled tree to the northwest.
- Investigate the duplicated gnarled tree located at the southwest part of the island.
- Investigate the western fishing boat.
- Investigate the fishing boat on the east side of the island.
- Investigate the old dock just next to the eastern fishing boat.
- Investigate the old dock on the southern side of the island.
- Investigate the cave entrance to the southeast.
- Investigate the cave entrance to the northwest.
- Investigate the rock formation on the west side of the island.
- Investigate the rock formation just to the northeast of the previous rock formation.
-
After all of the locations have been harvested, proceed back into the dungeon to speak to V again. He will note that your valiant efforts have had no effect. He is still losing his strength and you will be thrown into another cut-scene. After the scene ends, V will be dead. Head into the room north of his body and search V's belongings to find V's Journal. While reading, you will locate some Map fragments within the joural. Inspect these and solve the puzzle. You will receive a Map.
Note: Before proceeding with the next few steps, make sure you have Soft clay, a Mithril bar, an Antifire)/Super antifire potions, and food with you.
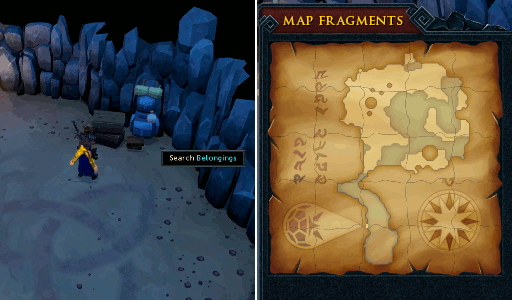 Image last updated: Oct 03, 2019 Update Image?
-
Head to the Ancient Cavern located below Baxtorian falls. Once inside, go up the stairs just south of the Waterfiend and proceed past Kuradal into the Dragon Forge area. On the western wall you will find an ancient door. Try to open the door and then use your Soft clay on it to create a Key mould.
Note: The easiest way to reach the Ancient Cavern is by using a Ferocious ring or the Fairy rings (B J Q)
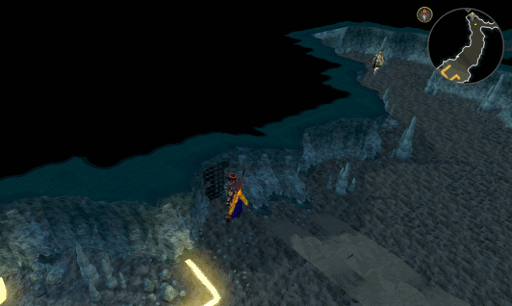 Image last updated: Oct 03, 2019 Update Image?
-
Head back downstairs, and then to the east side of the cave to a staircase. Make sure you have your Antifire protection ready. Go up the stairs to the Mithril dragon area. Attack a dragon and then use your Key mould on it to create a Dragon-mithril key.
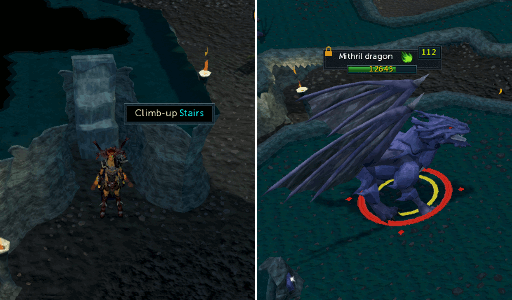 Image last updated: Oct 03, 2019 Update Image?
-
Head back to the door you made the mould on and use the key to enter. Past the door you will encounter an
Adamant dragon, which you need to kill. After defeating the dragon, a cut scene about the dragonkin will occur.
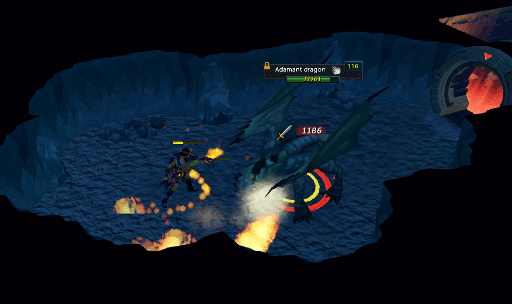 Image last updated: Oct 03, 2019 Update Image?
-
Head into the room and talk to Sakirth. He will damage you to low lifepoints. After asking him where the elder mirror is, head into the room to the west and jump across the stepping stones to reach the chest. Start from the stone on the far west, head diagonally northaast three times, then go northwest twice, and west to arrive at the chest (follow the white dots on the image below). Upon opening the chest, you will find a Dragonkin key. Head back across the stepping stones and jump torwards the northaast twice onto the ledge on the northern side (follow the light blue dots on the image below).
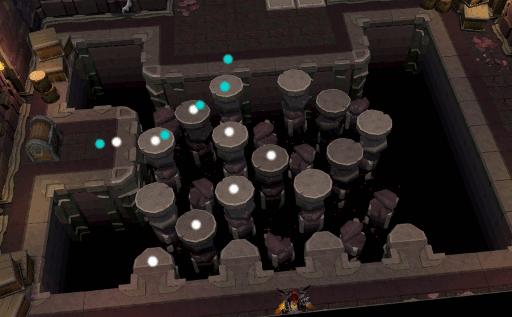 Image last updated: Oct 03, 2019 Update Image?
-
In front of you, you will find an area filled with a series of pressure plates. If you step on these, you will alert Kalibath of your presence, and be teleported back to the start. This puzzle works similar to the statues and barrels in Dungeoneering. Follow the steps below to reach a door on eastern side of the cave.
- Walk around the plates until you reach a crate. Push the crate north twice
- Walk around the plates and then push the next two crates north twice.
- Push the eastern crate eastwards twice.
- Walk around the plates and push the northernmost crate of the two westwards.
- Push the crate just south of you southwards.
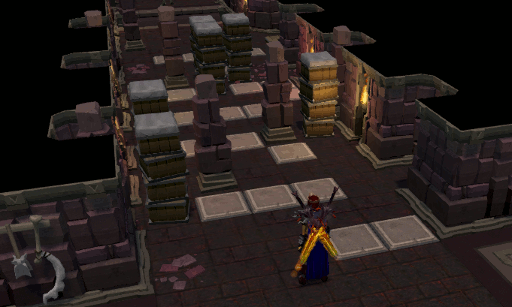 Image last updated: Oct 03, 2019 Update Image?
-
Go through the door to find a chest. Search within the chest for a Dragonkin protective charm and Notes. Equip the Dragonkin protective charm into your pocket slot. It will reduce the damage you take during your fights with Tarsak. Now, read the Notes.
Note: Before proceeding to the next step, make sure you have Antifire)/Super antifire potions, combat equipment, and plenty of food with you.
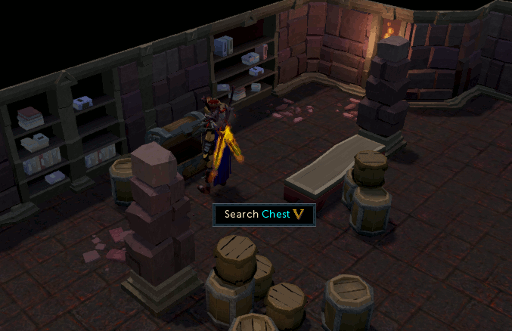 Image last updated: Oct 03, 2019 Update Image?
-
Travel to the Grotworm Lair, west of Port Sarim. Make your to the third floor of the lair and cross the bridge until you reach some stairs.
Note: The easiest way to reach the third floor is by using the Agility shortcut (level 50) near the entrance.
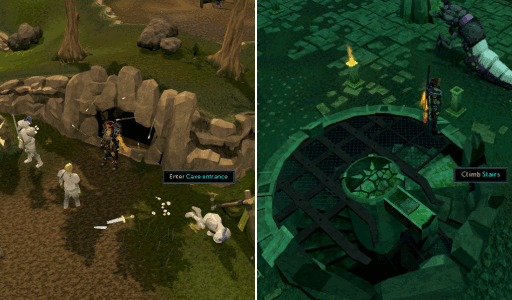 Image last updated: Oct 03, 2019 Update Image?
-
Go down the stairs and you will encounter another cut-scene where Phalaks is arguing with Tarshak. After the cut-scene is over, Tarshak will attack you. He will channel an attack that will stun you. You can evade the attack by simply step out of melee range. This attack can potentially cause high damage, so make sure you are prepared. He will also spew a fireball at you. You can negate this damage by quickly stepping out of the area.
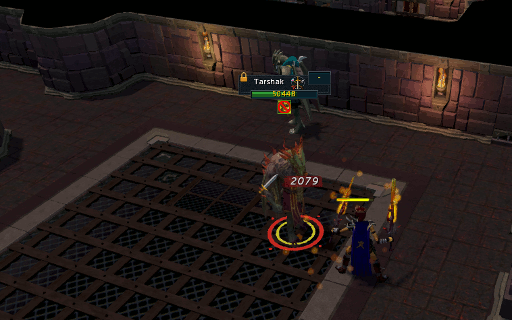 Image last updated: Oct 03, 2019 Update Image?
-
After defeating Tarshak, he will teleport away to Brimhaven Dungeon. Speak to Sakirth and travel to the dungeon entrance on Karamja. Pay Saniboch the entrance fee and enter the dungeon. Make your way to the area with the Iron and Steel Dragon. Along the western wall, you will find the entrance to a tunnel.
Note: The easiest way to reach Brimhaven is by using the Karamja lodestone.
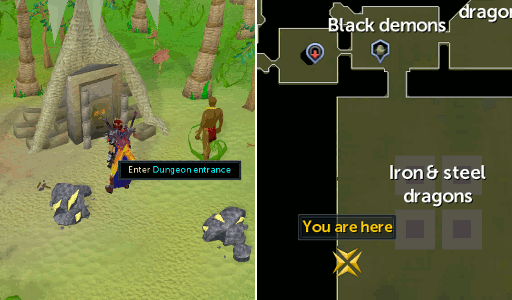 Image last updated: Oct 03, 2019 Update Image?
-
At the end of the tunnel you will find Tarshak, who has mutated into an Abomination. Now it's up to you to fight him once again. For the first part of the fight, you will not be able to directly harm the Abomination. You will need to use his environment against him by mining the pillars around the room twice. After you have mined each pillar, you will need to direct the fireball explosion onto the pillar simply by standing next to it while it chases you.
During this phase, he will have four specific attacks.- A wall of fire that will damage you until you run into the water pools.
- Smashes the ground to send a shockwave covering a quarter of the room twice.
- Fills one of the two quarters of the rooms he didn't affect with the shockwave with cave-ins. (This is avoided by running into an area that was affected by the shockwave as soon as one is over.)
- A fireball that will chase your character around.
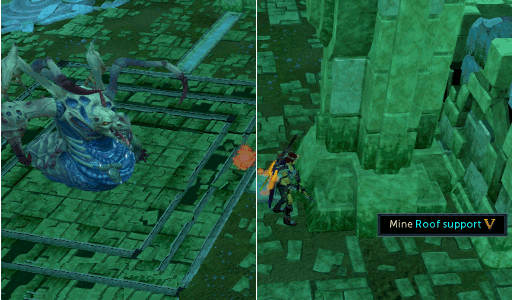 Image last updated: Oct 03, 2019 Update Image?
-
Part two is back to normal styled fighting. The Abomination will crawl out from under the rubble of the ceiling and you will need to kill him. You can either chose to face it and fight him like a normal monster, or keep running away from him and let the rubble and fireballs kill him. Note: You will need to avoid the rubble and fireballs yourself during this phase.
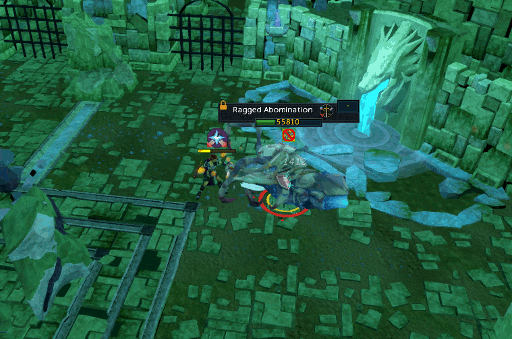 Image last updated: Oct 03, 2019 Update Image?
-
Once you have killed the abomination, the dragonkin Kerapac, Kalibath, Phalaks, Sakirth and Strisath will appear and begin fighting in a cut-scene. Once it is over, return to Rellekka and speak to Alfrick or Freya Lune to travel back to the trading post island to claim your reward. Part of the cave will have been turned into a shrine for the hero V. Speak to them once again when you enter the room.
Congratulations! Quest Complete!
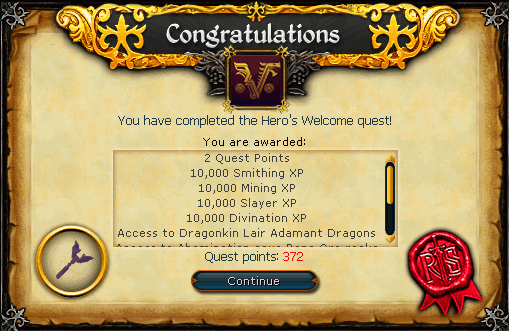 Image last updated: Oct 03, 2019 Update Image?
Rewards
10,000 Smithing XP, 10,000 Mining XP, 10,000 Slayer XP, 10,000 Divination XP, Access to Dragonkin Lair Adamant Dragons, Access to Abomination cave Bane ore rocks, The ability to produce 5% more runes when Runecrafting, Replayable Abomination boss fight, and 2 Treasure Hunter keys.
Guide Credits & History
| Writers | Rooskii |
|---|---|
| Contributors | Alfawarlord |
| First Uploader | Jarkur |
| Date Added | Feb 28, 2016 |
| Last Updater | Alfawarlord |
| Last Updated | Oct 03, 2019 |
Guide Feedback
Rate this guide
You can report issues without logging in. Log in to leave ratings and watch pages.
Want to help keep RuneHQ's guides up to date?
We're always looking for knowledgeable players to write, review, and improve our content. Join the team and help thousands of adventurers.