Salt in the Wound
Quest Details
| Difficulty | Intermediate |
|---|---|
| Type | Quest |
| Length | Medium |
| Quest Points | 2 |
| Members | Yes |
Start Point
Eastern part of Daemonheim.
Requirements
Skill Requirements
Quest Requirements
Items Needed
None.
Items Acquired During Quest
Ring of kinship, Food, Armor, Ranged attack method and Magic attack method.
Walkthrough
-
Travel to Daemonheim and talk to Kennith in the eastern part of the city near the Fremennik Shipmaster. He will invite you to help him get rid of the sea slugs. Kennith will then teleport closer to Daemonheim.
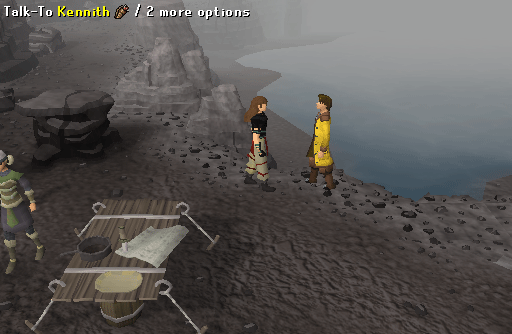 Image last updated: Aug 22, 2014 Update Image?
 -
Head west and speak to Kennith again. Ezekial Lovecraft and Eva will teleport to your location. Speak to Ezekial and go through all of the options. Finally talk to Eva and a cut scene will occur.
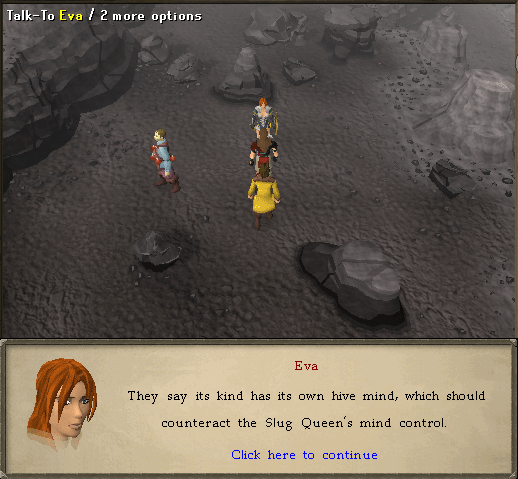 Image last updated: Aug 22, 2014 Update Image?
 -
When the cut scene is over, you will find yourself in a Dungeoneering floor in Daemonheim. Go through the door to the east and dismiss the familiar puzzle on the door on the far east.
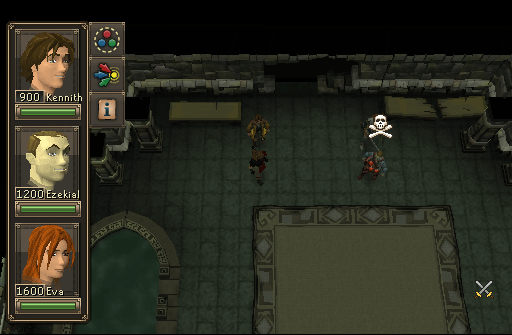 Image last updated: Aug 22, 2014 Update Image?
-
You will now be inside a room with 3 monsters. Defeat these and pick up the Blue triangle key. Head back to the starting room and open the Blue triangle door with the key.
-
You will find yourself in a room with a Caustic Gazer blocking your access to the other side of a jump stone puzzle. To get to the other side, distract the Gazer by "Tanking" it while directing a chosen member of the team (preferably the member with the highest health) to the other side. The correct path is as follows (See below). When you have reached the other side, inspect the dead Seeker of Truth and lead your chosen character back to the rest of the team.
- Jump south
- Jump west 2x
- Jump south
- Jump north
- Walk north
- Walk east
- Jump east 2x
- Jump south 3x
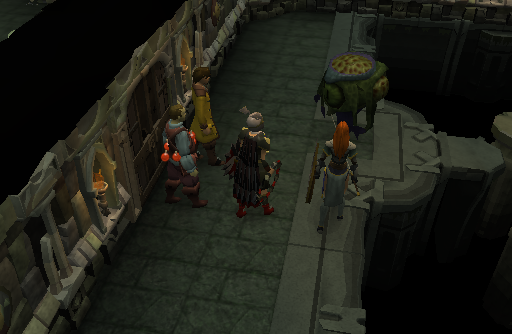 Image last updated: Aug 22, 2014 Update Image?
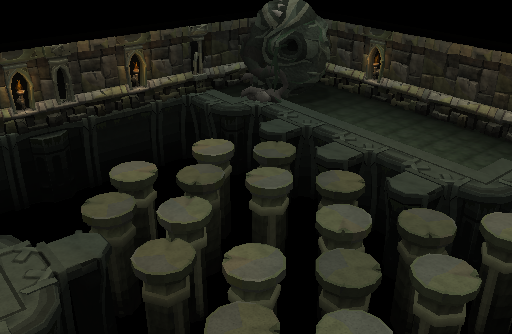 Image last updated: Aug 22, 2014 Update Image?
 Image last updated: Aug 22, 2014 Update Image?
 -
Speak to Kennith who will ask if you are ready to be teleported to the Fishing Platform; agree to be teleported. Upon arrival, speak to him again and he will tell you to find the ingredients required for an Anti-mind control serum.
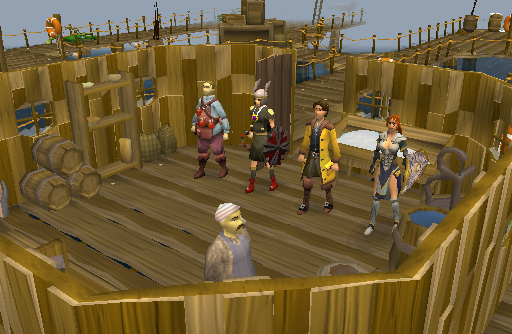 Image last updated: Aug 22, 2014 Update Image?
-
The first ingredient is freely-given blood. Speak to Bailey and "Punch Him." He informs you he feels no pain. Ask him to prove it, and he will cut himself with a shard of glass drawing his own blood. He will then hand you Blood-stained glass as proof.
-
The second ingredient is a live specimen of a Sea slug. Head east to the Fishing spot and lure there. A Sea slug will jump out. Do not attempt to take it as you will take damage. Instead, walk back towards Kennith who will stun it and the Dazed sea slug will appear in your inventory. Speak to him again and when you inform him that you have obtained all the ingredients, he will give you a Seeker gland. Pick up the Pestle and mortar in the room, and use any of the ingredients on it to create the Anti-mind control serum. Speak to Kennith who will then head to the Citadel.
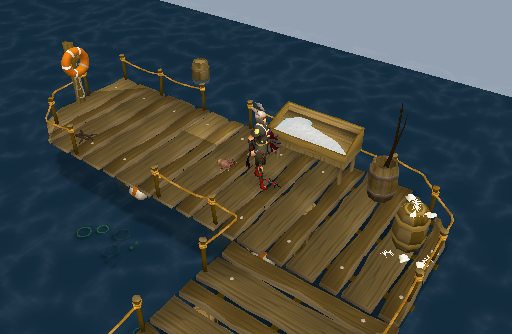 Image last updated: Aug 22, 2014 Update Image?
-
Leave the room and head west and attempt to enter the cave by talking to the Slug thralls. Say, "Why can't I come in?" Then say, "I'm not a stranger." Say, "I seek enlightenment in the joining." and finally, "I wish to hear..." and the guards will let you enter.
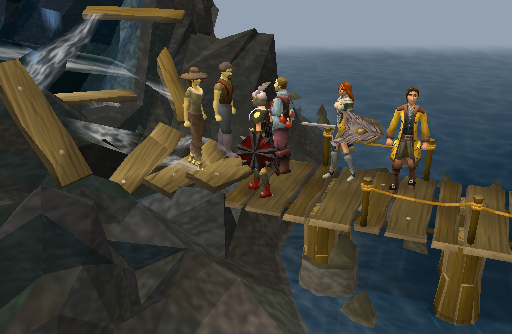 Image last updated: Aug 22, 2014 Update Image?
- Citadel Room 1
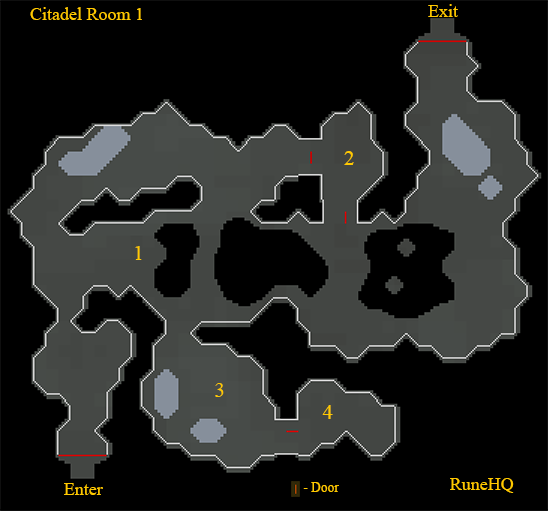 Image last updated: Aug 22, 2014 Update Image?
Note: For the Citadel rooms if you are noticed by the villagers, they will stun you and call a level 86 Risen knight to attack you. These come in 3 types, Melee, Ranged and Magic. If a level 86 is a problem, you will need to knock out the villager without being seen to move past them.
Your allies will heal themselves when you enter a new room, so if you are low on food it's best to save it for later. If you do need to leave the cave to restock, you will start at the beginning at Witchaven, but your progress on completed puzzles and monsters will be saved.
- Upon entering the cave, head north to the villager facing east overlooking the bridge. (room 1).
- If you are confident you can easily kill the Risen knights, skip this step
If you are worried about your ability to kill Risen knights, order one of the team to remain behind (To do this you need to click on the team member's avatar, you then have control of them. To switch back to your character, click the chosen character again.).
- Move the rest (or all) of the team north and then east to the metal gate that is closed (outside room 2).
- Make your team remain behind (by clicking on them twice, once to control and once to release)
-
If you left a person at room 1, once your in position at the bridge to room 3, knock out the villager and then you head south to room 3. otherwise just run across the bridge and kill the Risen Knight and head to room 3.
-
Follow behind the female Witchaven villager (in room 3) as she shuffles around the column. If spotted by the female Witchaven villager the villager will summon a Risen knight. Kill the knight if necessary.
-
Head in to room 4 and pull the lever.
-
Command the other players outside room 2 to go into room 2 and once they are all in the room, pull the lever there.
-
Switch back to your character by clicking the chosen character, if you left someone in room 1, have them knock out the villager in room 1 at the right time for you to cross the bridge and then head back to the room 2 and regroup the whole team in room 2.
-
To exit the room pull the room 2 lever once more and go through the southern door. Choose to either kill the enemies or run through to the next room by heading north through the exit. You cannot exit until the whole party is at the door.
- Upon entering the cave, head north to the villager facing east overlooking the bridge. (room 1).
- Citadel Room 2
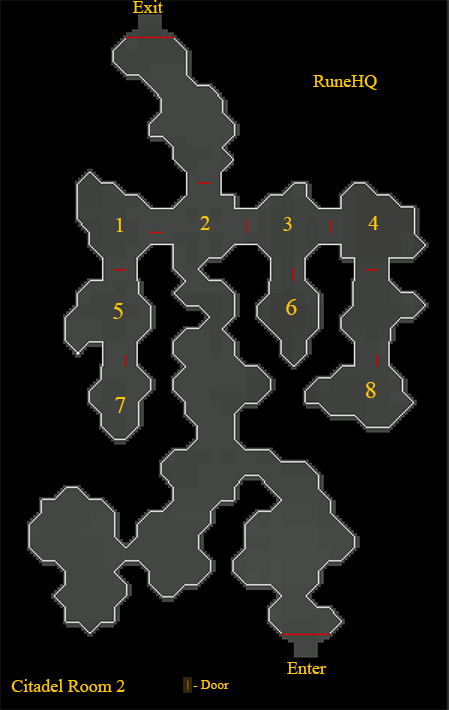 Image last updated: Aug 22, 2014 Update Image?
- Wait until the villager walking north and south from room 2 is heading south past the path your coming from, then Take the whole team and head as far north as possible (Room 2).
- Pull the lever then send Kennith into the eastern room 3. Have yourself go into room 6.
- Once you get to room 6 pull the lever.
- Swap back to Kennith and send him into the far eastern room 4 to pull the lever.
- Swap back to your character, and pull the lever in this south room 6 again.
- Have Ezekial go to room 7 (knocking out the villager in room 5 on the way), pull the lever in room 7.
- Switch to Kennith and have him pull his lever again and then head fully south to room 8 and pulling the lever there.
- Take your character back to the central room 2 to wait with Eva.
- Now send Kennith back one room north at the door for room 4.
- Have Ezekial pull his lever, thereby opening the door for Kennith.
- Get Kennith to the central room with Eva and your character.
- Finally, order Ezekial to pull the lever once more and bring him back with the rest of the team.
- The whole team should now be together. Head north and enter the next cave to progress.
- Wait until the villager walking north and south from room 2 is heading south past the path your coming from, then Take the whole team and head as far north as possible (Room 2).
- Citadel Room 3
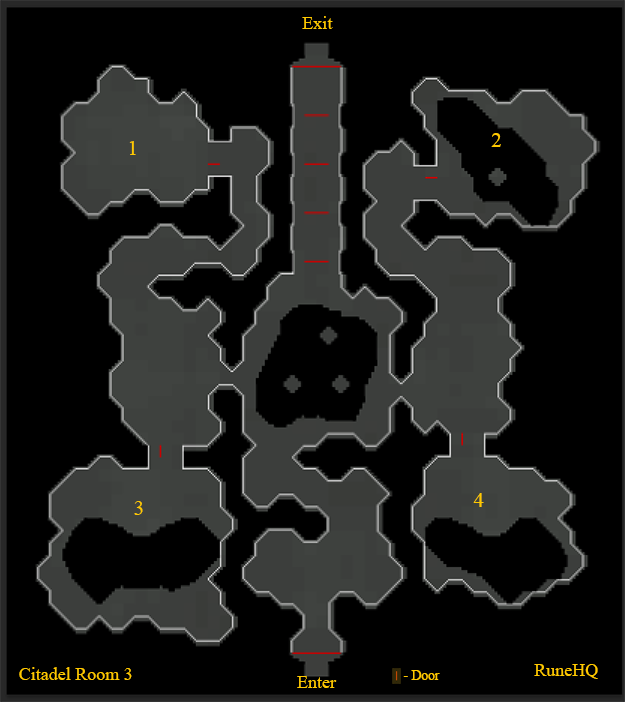 Image last updated: Aug 22, 2014 Update Image?
- Inside this room, defeat all, or as many of, the enemies as possible to make the room easier to move around in.
- Have your character go to the NW (room 1) corner, knocking out the villager in the area.
- Send one team member to each of the rooms NE (room 2), SW (room 3), and SE (room 4) corners.
- Have the person in room 2 pull their lever.
- Have the person in room 4 pull thier lever.
- Have the person in room 3 pull their lever.
- Finally pull your lever in room 1.
- Once all four levers have been pulled, regather the team, head through the multiple gates, and enter the northern cave exit.
- Inside this room, defeat all, or as many of, the enemies as possible to make the room easier to move around in.
- Citadel Room 4
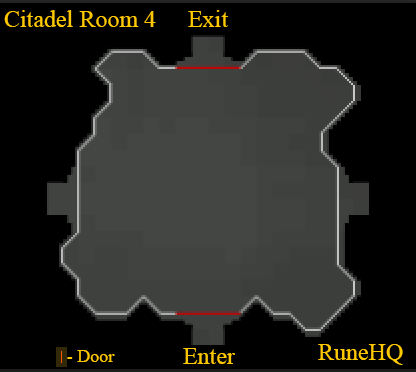 Image last updated: Aug 22, 2014 Update Image?
Note: If any of your team members die, you will have to redo the room.
-
You will now enter a room with a strange device. Have your character investigate it and you will be asked to insert your arm, which will cause you to become trapped and unable to move.
-
You must now use your team to defeat the waves of enemies that are in the room or that approach. Some of the Risen Knights will be behind gates in the room and will not approach, you must seek them out. When they defeat the first wave, your character will move to the other side of the device, and they must defeat more enemies.
- After all enemies are defeated, and all three sides completed, you can move through the northern cave exit.
-
You will now enter a room with a strange device. Have your character investigate it and you will be asked to insert your arm, which will cause you to become trapped and unable to move.
- Citadel Room 5 Slug Queen
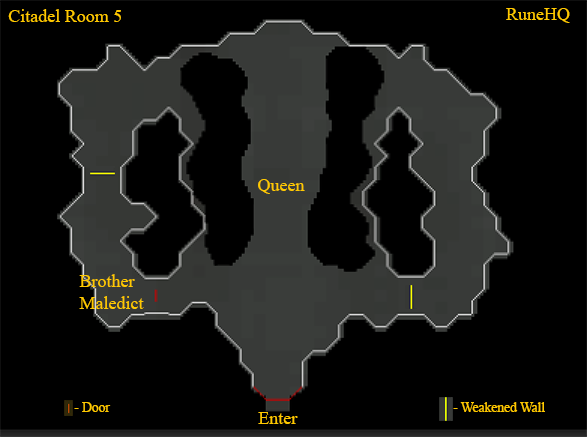 Image last updated: Aug 22, 2014 Update Image?
-
In the next room you will come face to face with the Slug Queen/Mother Mallum. You must defeat her by using the Serum on her; but first you have to distract her.
-
Make Kennith go west to speak to Brother Maledict who will open the door, to let you in, go through the gate.
-
Have Kennith to pull the lever.
-
Take Ezekial and head west and then north and break down the wall.
-
Make Kennith move north through the broken wall.
-
Then take Ezekial back to the central room, and have him break down the eastern wall and kill the Risen knight. Have him continue to move north.
- Note: You may have to adjust your camera angle in order to see the queen for this step.
Position Kennith and Ezekial on opposite sides of the chasm facing the Mother Mallum and have them attack the Queen. This step is critical to continue on past this step! Otherwise, Eva will be busy and not able to be commanded, plus you are immobilized by the queen.
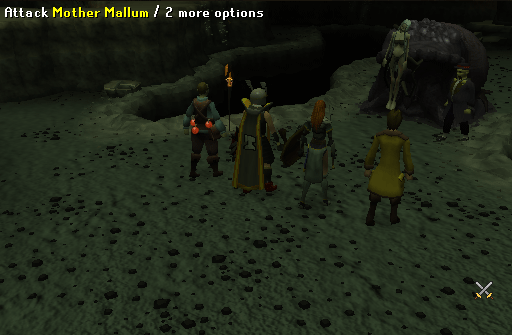 Image last updated: Aug 22, 2014 Update Image?
-
Now switch to Eva and make her attack the Queen, but Mayor Hobbs will block her path. Knock him out and again attack with Eva. Eva will be thrown and knocked out causing a pillar on the northern side to weaken.
-
With Eva, head north of the pillar and push it over onto the Queen, killing her.
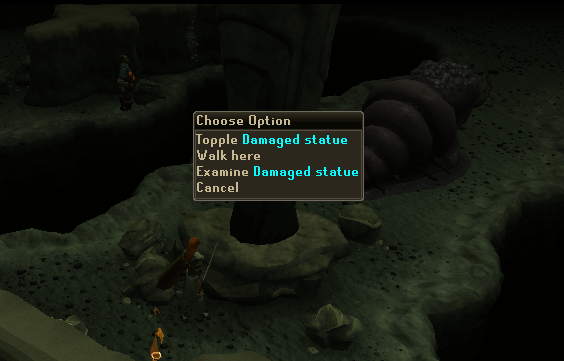 Image last updated: Aug 22, 2014 Update Image?
-
Speak to Lucy, the old woman on the floor, and select any option. Exit the cave and speak to any members of your team to finish.
-
In the next room you will come face to face with the Slug Queen/Mother Mallum. You must defeat her by using the Serum on her; but first you have to distract her.
-
Congratulations! Quest Complete!
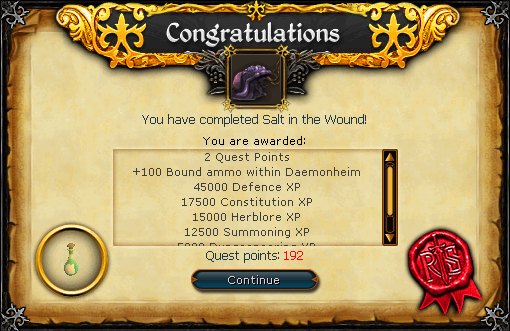 Image last updated: Aug 22, 2014 Update Image?
Rewards
45K Defence XP, 17.5K Constitution XP, 15K Herblore XP, 12.5k Summoning XP, 5K Dungeoneering XP, +100 Bound ammo within Daemonheim, and 2 free keys for Treasure Hunter.
Guide Credits & History
| Writers | Heavens Vibe |
|---|---|
| Contributors | Greg, Vane, Yeldarb12, DarkBlitz, Avoricofgol, Smexy Sarah. |
| First Uploader | Alfawarlord |
| Date Added | Jul 06, 2011 |
| Last Updater | DRAVAN |
| Last Updated | Aug 22, 2014 |
Guide Feedback
Rate this guide
You can report issues without logging in. Log in to leave ratings and watch pages.
Want to help keep RuneHQ's guides up to date?
We're always looking for knowledgeable players to write, review, and improve our content. Join the team and help thousands of adventurers.