Once Upon a Time in Gielinor
Quest Details
| Difficulty | Novice |
|---|---|
| Type | Quest |
| Length | Medium-Long |
| Quest Points | 4 |
| Members | Yes |
Start Point
Items Needed
Items Acquired During Quest
- Teleport method to:
- Archaeology journal (with 22 Archaeology) or Fort Forinthry Teleport
Walkthrough
Foreshadowing
-
Talk to Relomia and she will tell you to get a drink and $ilnkfull31754 the from table next to her as it's time to celebrate 20 years of your famously heroic deeds! Interact with the table West of her and you will be given the option to choose between alcoholic or non-alcoholic drink (same thing will happen regardless of which you choose).
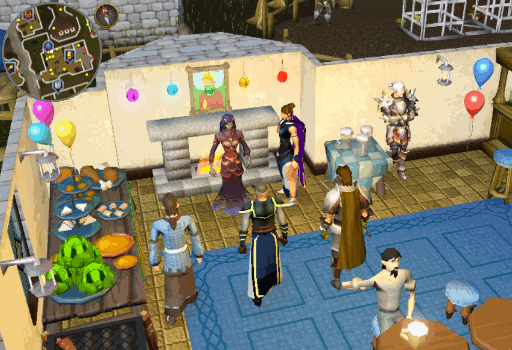 Image last updated: Feb 20, 2023 Update Image?
-
Drink the $ilnkfull31755/$ilnkfull31756 and wear the $ilnkfull31754, then talk to Relomia again. It will quickly become apparent that the other people in the room think she is you. Going through the dialogue, Relomia will recount "her deeds" to the people asking, but she isn't you and will get some details wrong that you must correct. The three quests (even if you haven't done them yet) are recounted in a random order, so (in proper RuneHQ fashion) we will go through them alphabetically below.
- Demon Slayer, Gideon Bede: Use Silverlight, not Blacklight (not to mention it's called Darklight later, not Blacklight)
- Dragon Slayer, Guildmaster: Elvarg only has one head, not three
- Vampyre Slayer, Morgan: Count Draynor has to be beaten with the help of a wooden stake, not an iron flock
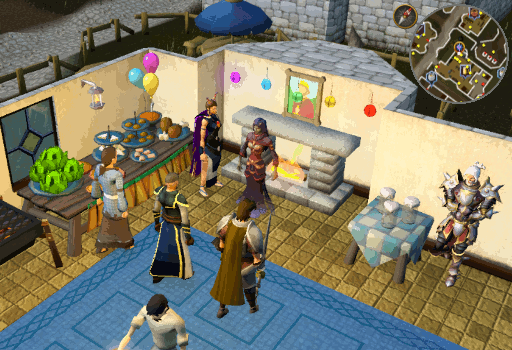 Image last updated: Feb 20, 2023 Update Image?
-
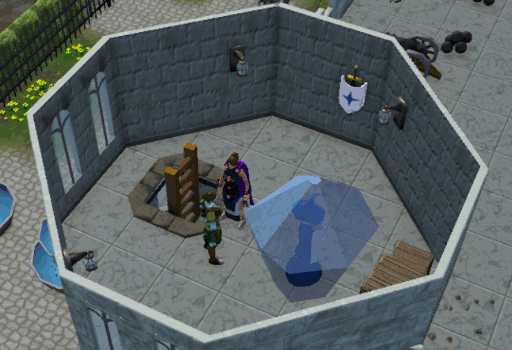
Arriving in $plnkfull706's office will immediately start a dialogue. He will think you are Relomia as well and remark on how many guards and cows get sent to him as a result of [Your name]'s work. After looking a little closer, he will realize that you are yourself not Relomia. He will sort out the current identity mix up, but advises that you take it up with his friend, $plnkfull3541, to help avoid this confusion every time you die. Before you leave, he remarks that the hat makes you look ridiculous. Don't take it off or destroy it though! You will need it later.
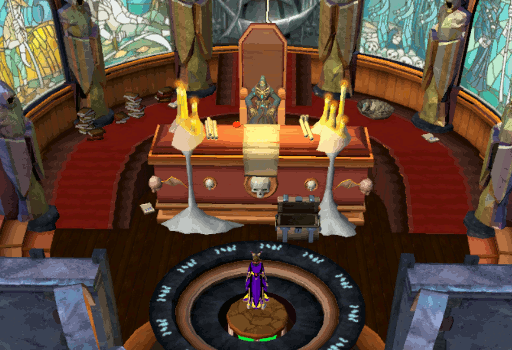 Image last updated: Feb 20, 2023 Update Image?
-
On the East side of $plnkfull706's office, the North wall has a door marked as "Closure's Study". Walk through it and you will find the beings you slew in the adventures that were being recounted by your replacement at the Blue Moon Inn. Time works differently in this study apparently and that is supposed to explain why you are talking to their dead souls, even if you haven't actually completed those quests yet. That still doesn't explain why the people in the Blue Moon Inn thought you'd already done them, though.
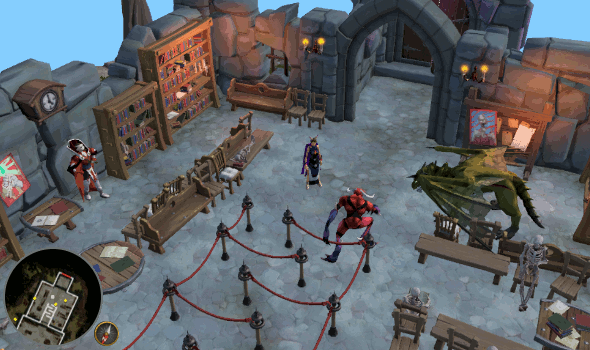 Image last updated: Feb 20, 2023 Update Image?
-
Talk to the any of the antagonists (or try talking to $plnkfull3541) and it will become clear that you must get the antagonist's unfinished business taken care of before you can talk to $plnkfull3541. This is because they are all in line and once their business is completed, they will no longer need to be there thus you can move forward in their places (but, let's be honest, it doesn't look like Elvarg or the Count are actually in line). Once again, we will break them down alphabetically by quest. It is recommended to begin with Delrith as you don't even need to leave the room to deal with him. Once he is gone, speak to both of the others to help avoid going back in forth (talk to both, complete both tasks, return and talk to both again.
-
Demon Slayer: Delrith
As it turns out, you merely killed Delrith instead of banishing him. Whoops. He will tell you the words to the banishment ritual: Carlem Aber Camerintum Purchai Gabindo. Once you have been told the words, repeat them back to him in the proper order (3, 1, 2, 5, 4) and he will be sucked in a vortex back to Dis (after dissing your hat), allowing you to take his place in the queue.
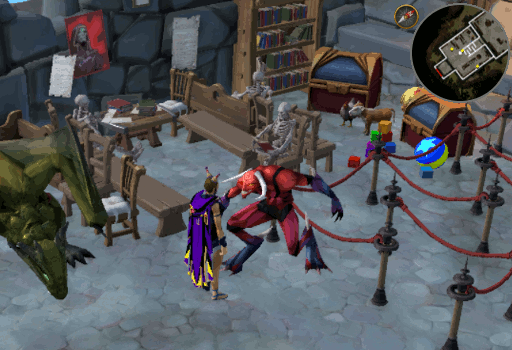 Image last updated: Feb 20, 2023 Update Image?
-
Dragon Slayer: Elvarg
She will tell you that she doesn't want her treasure hoard going to her offspring because they're greedy whelps who don't deserve her treasure. You'd think this means a trip to Crandor, but you'd be wrong. She kept her treasure in a bank account; what do you take her for? She will give you her Last Will and Testament and tell you to talk to a banker at the Grand Exchange in Varrock. You must use it on a banker at that location, other grand exchange locations will not work, nor will a $plnkfull2322: it must be a banker. In exchange for the Last Will and Testament you will receive $ilnkfull31752. You can peek at it if you like, though that is a little rude and she will know that you looked. Once you have obtained $ilnkfull31752, return to $plnkfull3541's study to give it to Elvarg (who will claim your $ilnkfull31754 may devalue hers by proxy) and move forward in the queue.
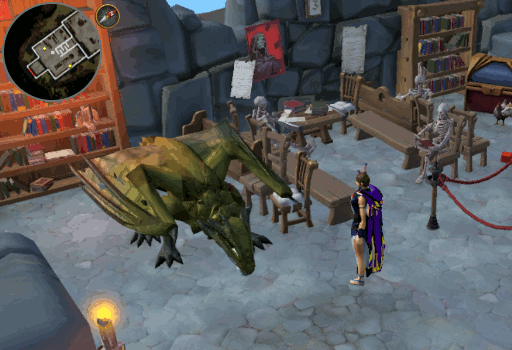 Image last updated: Feb 20, 2023 Update Image?
-
Vampyre Slayer: Count Draynor
He is worried that he might have left the oven on; might as well check your own while you're at it. Head into Draynor Manor (Draynor lodestone is the fastest method), make your way to the North Western-most room, and turn off the range. After that, simply return to $plnkfull3541's study by way of $plnkfull706's office and tell the Count that you took care of it. He will leave, after telling you that the $ilnkfull31754 is enough of a punishment for you, allowing you to advance in the queue.
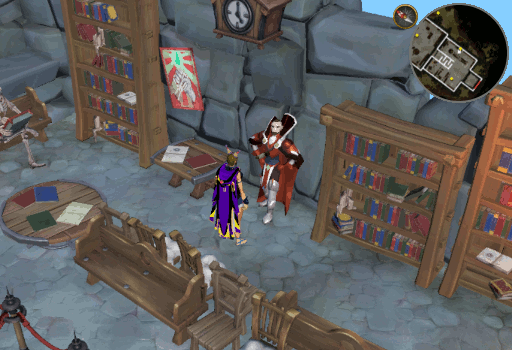 Image last updated: Feb 20, 2023 Update Image?
-
Demon Slayer: Delrith
-
With the line cleared, make your way into $plnkfull3541's study and talk to him. He will make it clear that Relomia is essentially taking your place in your story. He further explains that controlling the narrative is dangerous because the longer she is you, the more long-term damage it could cause - even to the point of writing you out of existence! Unfortunately, he cannot simply remove her from your story on his own, though. He will need you to get her to willingly sign a $ilnkfull31751 in order to return your identity to you. Unfortunately, the second she sees you, she will know something is up and will never sign it for you. As a solution, he will place an illusion spell on the hat so that she will not recognize you while you wear it.
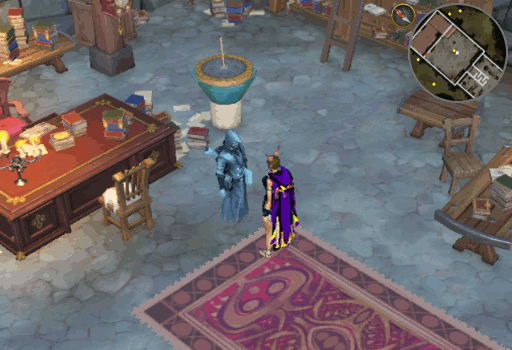 Image last updated: Feb 20, 2023 Update Image?
-
Head back to the Blue Moon Inn and talk to Relomia. To get her to sign the $ilnkfull31751, you will need to call her by your name, tell her you are your biggest fan, and that you want an autograph. After she realizes you have reclaimed your role as main protagonist, she will get upset that she doesn't get to be famous, provide some obvious foreshadowing, and vanish.
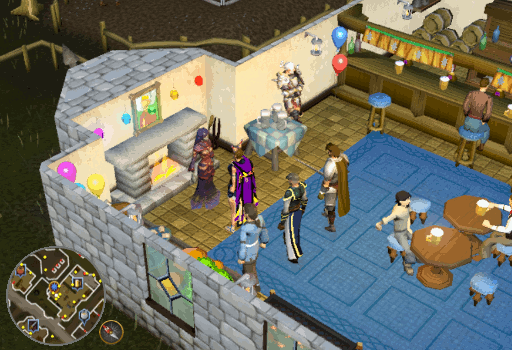 Image last updated: Feb 20, 2023 Update Image?
-
Return to $plnkfull3541's study and give him the $ilnkfull31751. He will remove your hat if you haven't already and you will receive your reward.
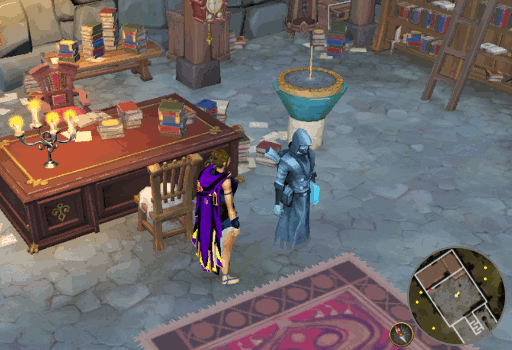 Image last updated: Feb 20, 2023 Update Image?
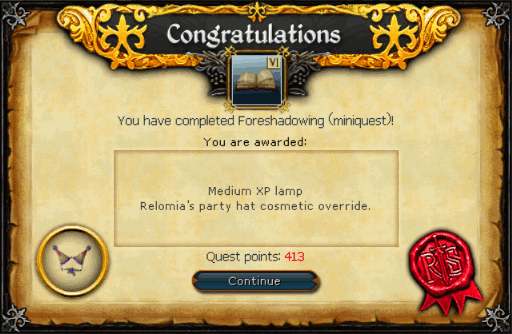
Congratulations, Foreshadowing segment complete!
Flashback
-
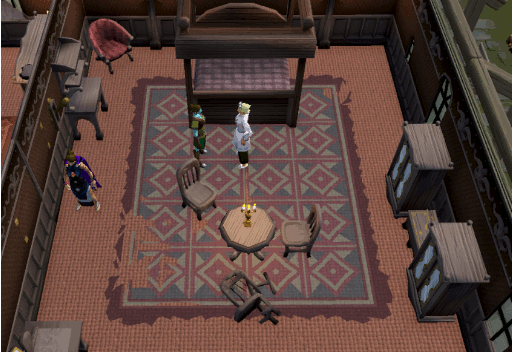
Talking to $plnkfull3541 will bring to light that his study is a mess (not that you can tell the difference). Accept the Miniquest and $plnkfull3541 will tell you Relomia stole some of his biographies! He will also tell you that should she write in them, they would change the history of the people those biographies are about. He wants you to track her down. To help you find her, he will show you his memory of the break-in. Continue the dialogue and the memory will be played for you. You will conclude that her statement about getting a cold drink suggests she will be at the Blue Moon Inn, where you found her in Foreshadowing. Complete the dialogue with $plnkfull3541 and you will leave his memory.
 Image last updated: Feb 20, 2023 Update Image?
-
Head to the Blue Moon Inn in Varrock and talk to the Bartender. He will disappoint you by not being a fan looking for an autograph, but instead will have a handwritten message for you from Relomia. She has pulled a Bowser and told you that "Your Relomia is in another Inn." More importantly, she hints at her location by saying that she wants things to be a little more "BOARing" for you. Wouldn't you know it, the other major inn in the Varrock area is the Jolly Boar Inn, located North East of the city, right by the Wilderness trench, the Infernal Source Dig Site, and South of Fort Forinthry.
 Image last updated: Feb 20, 2023 Update Image?
-
Go to the Jolly Boar Inn (using an Archaeology journal (with 22 Archaeology) or a Fort Forinthry Teleport are the fastest methods) and talk to Relomia at the South end of the building (right by the bar). After a brief argument, she will give you a $ilnkfull31759 and vanish.
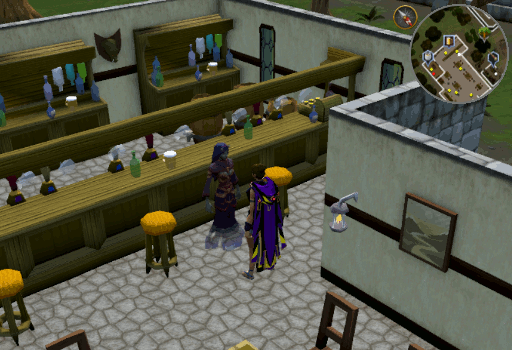 Image last updated: Feb 20, 2023 Update Image?
-
Return to $plnkfull3541 with his biographies. He is grateful for the help, but will say it is too late. Ava, Merlin, and Ozan are already in the lobby waiting. He can't simply revert her changes to the books without some references to figure out what the original text said. He will tell you that if you talk to the people in the waiting room he can put you into their memories and you can help discover what needs to be fixed.
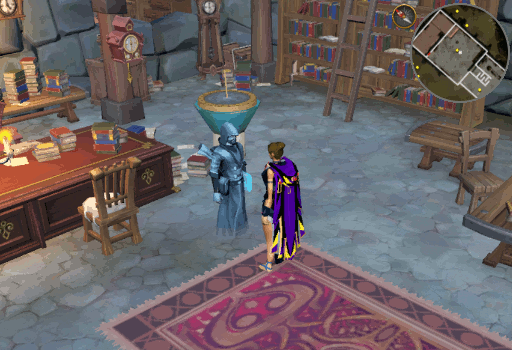 Image last updated: Feb 20, 2023 Update Image?
-
You can fix the memories in any order, but here we will cover them alphabetically. When you enter the memory of an individual you will have an $ilnkfull31758 in your inventory. This will enable you to play, restart, or pause the memory. In each memory there will be three key details that Relomia has changed. Once you have used the $ilnkfull31758 to play the memory once and then reset it, you will be able to investigate each key detail (one of which will always be your past self). Investigating it will make it cycle through a list of three options. You must leave the correct option to correct the memory and enable the person to leave.
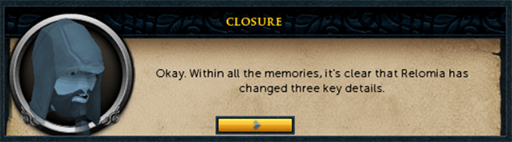 Image last updated: Feb 20, 2023 Update Image?
-
Ava
-
Talk to Ava to enter her memory. This memory is straight out of Animal Magnetism, but instead of giving her undead chickens, you will give her an undead cow and then Cow1337killr will come and kill her. Restart the memory to start fixing it.
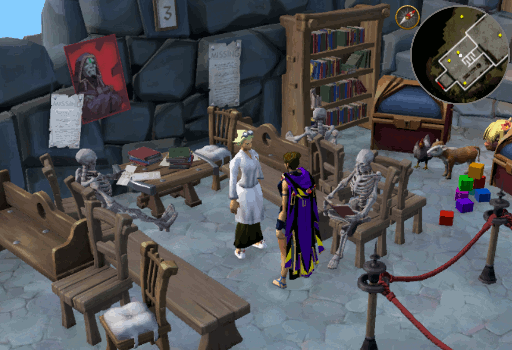 Image last updated: Feb 20, 2023 Update Image?
-
On the East wall is a "Lever B", which is one that is found in the basement, not in here. Investigate it until it shows a standard lever. Investigate your past self and change what you give Ava from an undead cow to $ilnkfull3244. Finally, the West wall has a "Spooky clock." Investigate it until it becomes a wardrobe. Play the memory again and you will return to $plnkfull3541's study. Talk to Ava to tell her she is free to go.
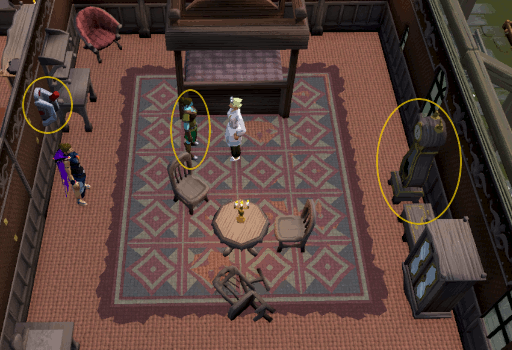 Image last updated: Feb 20, 2023 Update Image?
Click image to see corrected area.
-
Talk to Ava to enter her memory. This memory is straight out of Animal Magnetism, but instead of giving her undead chickens, you will give her an undead cow and then Cow1337killr will come and kill her. Restart the memory to start fixing it.
-
Merlin
-
Talk to Merlin to enter his memory. This memory is from Merlin's Crystal, but Relomia has changed it so that you break the latsyrc with a cannon, killing Merlin in the process. Restart the memory to start fixing it.
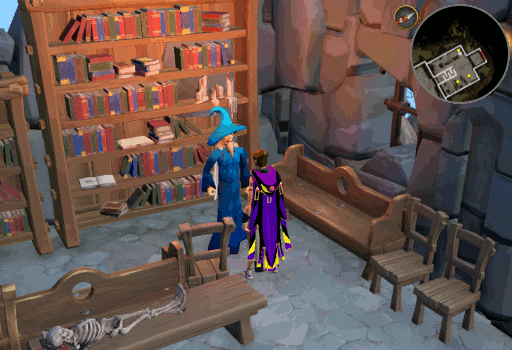 Image last updated: Feb 20, 2023 Update Image?
-
Start by investigating the latsyrc (which is just crystal backwards) until it is a giant crystal with Merlin inside. Then investigate the 'Merlin sucks' shield on the West wall until it is a wallshield. Finally, instigate your past self to change how you break the crystal to $ilnkfull400. Play the memory again and you will return to $plnkfull3541's study. Talk to Merlin to tell him he is free to go.
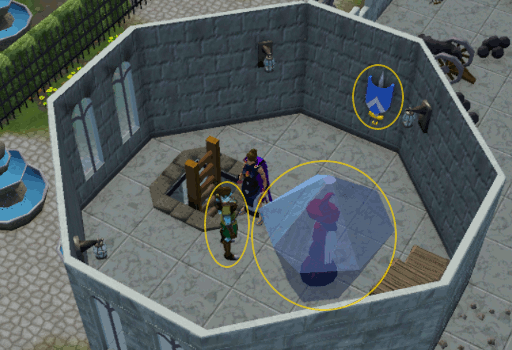 Image last updated: Feb 20, 2023 Update Image?
Click image to see corrected area.
-
Talk to Merlin to enter his memory. This memory is from Merlin's Crystal, but Relomia has changed it so that you break the latsyrc with a cannon, killing Merlin in the process. Restart the memory to start fixing it.
-
Ozan
-
Talk to Ozan to enter his memory. This memory is out of Diamond in the Rough, but instead of jumping off the roof of the bank, a goblin appears and shoots Ozan in the back with an arrow. Restart the memory to start fixing it.
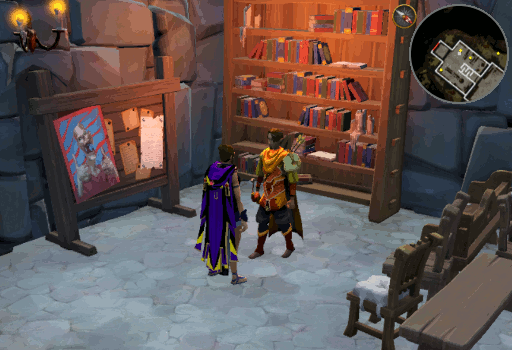 Image last updated: Feb 20, 2023 Update Image?
-
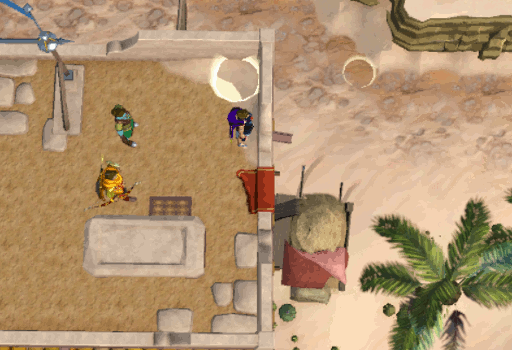
Interact with Ozan and your past self to determine who jumps down first. Your past self should jump first and Ozan should jump second. Then enter the convenient portal to go to the ground and interact with the empty cart until it is a cart filled with straw. Play the memory again and you will return to $plnkfull3541's study. Talk to Ozan to tell him he is free to go.
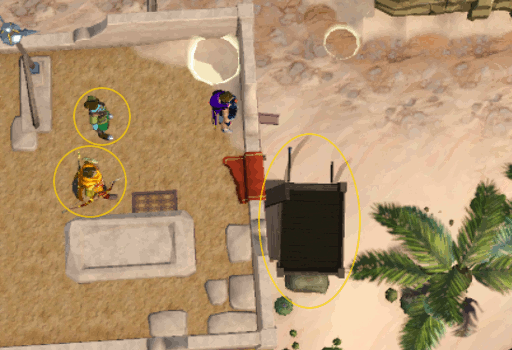 Image last updated: Feb 20, 2023 Update Image?
Click image to see corrected area.
-
Talk to Ozan to enter his memory. This memory is out of Diamond in the Rough, but instead of jumping off the roof of the bank, a goblin appears and shoots Ozan in the back with an arrow. Restart the memory to start fixing it.
-
Ava
-
With all of the people gone, talk to $plnkfull3541 and he will remark that leaving the biographies easy for anyone to take and edit is a bad idea before giving you your reward.
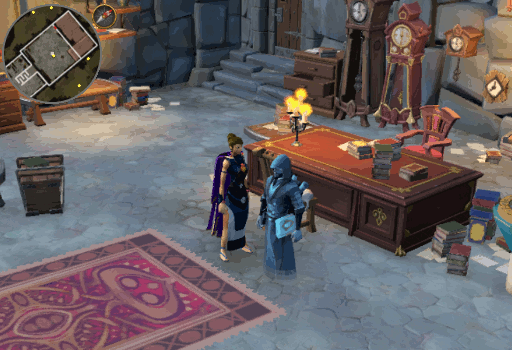 Image last updated: Feb 20, 2023 Update Image?
Congratulations, Flashback segment complete!

Fortunes
-
$plnkfull3541 wants to talk to you about your biography that he's writing, but like a good hero with ADHD, you get sidetracked by his thoughts on Relomia. It is highly possible that she is just a person without a purpose rather than an actual antagonist. You decide that you might be able to make her into a decent person if you gave her a chance. $plnkfull3541 calls up a few people who might have quests for her to complete for them.
 Image last updated: Feb 20, 2023 Update Image?
-
Go South into the waiting room and talk to the people he called: Ariane, Sir Tiffy, and Zanik. The order in which you speak to them doesn't matter and they will all say that they can't help you this time around.
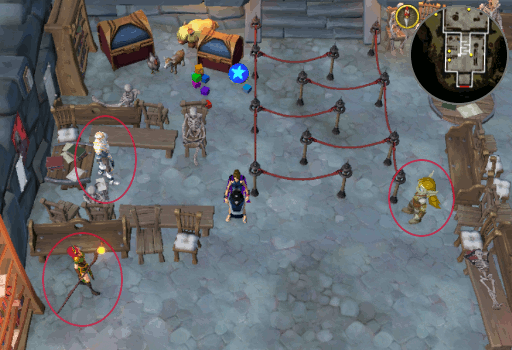 Image last updated: Feb 20, 2023 Update Image?
-
Return to $plnkfull3541 and talk to him. Death will appear and get mad that you are grabbing dead people to further your own ends all willy-nilly; you will have to appeal to him for aid. In order, talk to him about Icthlarin (option 1), Sliske (option 2), and himself (option 3). After that point, he will agree to help. Your first step in preparation will be to obtain 3 $ilnkfull31760 which you unfortunately can't just make yourself.
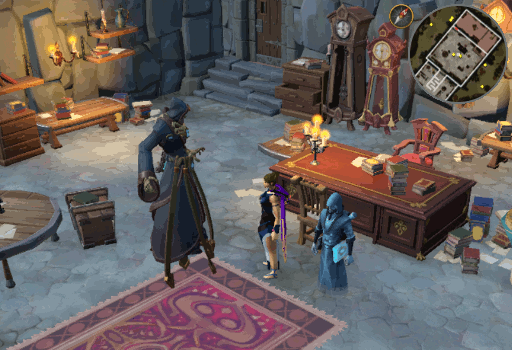 Image last updated: Feb 20, 2023 Update Image?
-
Leave $plnkfull3541's study and go to Draynor Village. Bordering the East side of the village is a wheat field in which you can find 3 $ilnkfull31760. You can also find a regular scarecrow, but it's just not going to do the job right.
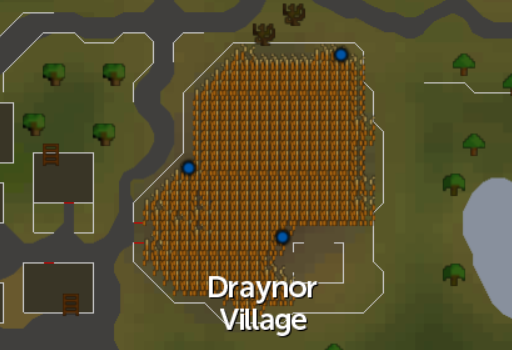 Image last updated: Feb 20, 2023 Update Image?
-
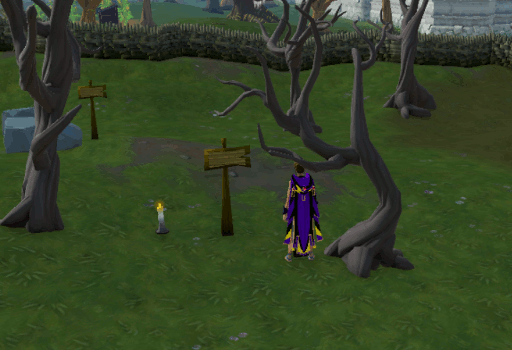
Take the $ilnkfull31760 to the wooded area between Death's hourglass and the farm South of Falador. There will be 3 markers at which you must prop up the scarecrows. Return to $plnkfull3541's study when you are done placing them all.
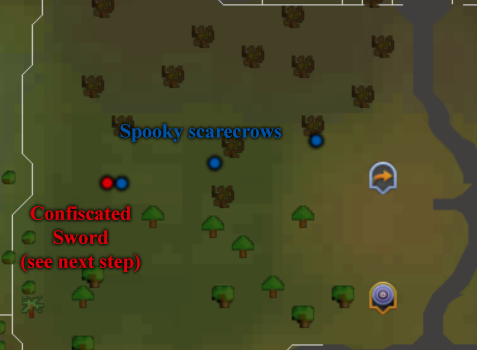 Image last updated: Feb 20, 2023 Update Image?
Click image to see what the markers look like.
-
Talk to $plnkfull3541 to find out what other preparations must be made to create a quest for Relomia. After some deliberation, Death will give you a $ilnkfull31761 to hide that Relomia can find. Return to the woods where you placed the scarecrows. Near the Westernmost one there will be another marker. Place the $ilnkfull31761 there and return to $plnkfull3541.
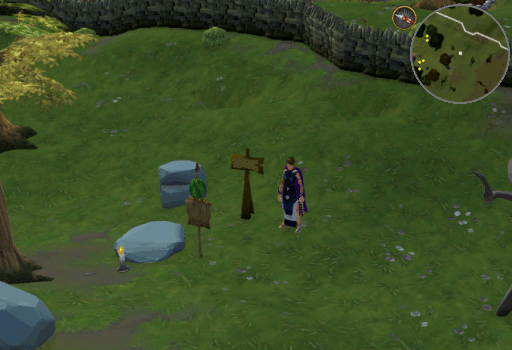 Image last updated: Feb 20, 2023 Update Image?
-
Talk to $plnkfull3541 and, after a bit of obvious planning going right over your character's head, you will be asked to go find Relomia.
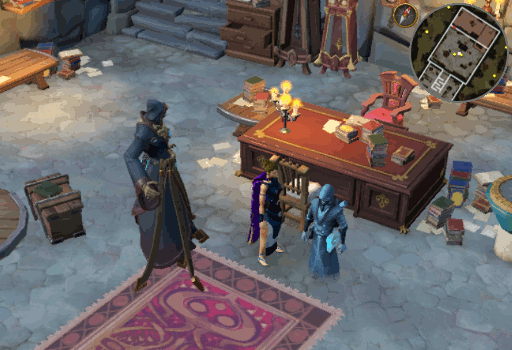 Image last updated: Feb 20, 2023 Update Image?
-
At this point you can either take the long route and go to either the Jolly Boar Inn (North East of Varrock) and/or the Blue Moon Inn (North of the Varrock lodestone) and talk to
the Bartenders OR you can skip to the next step.
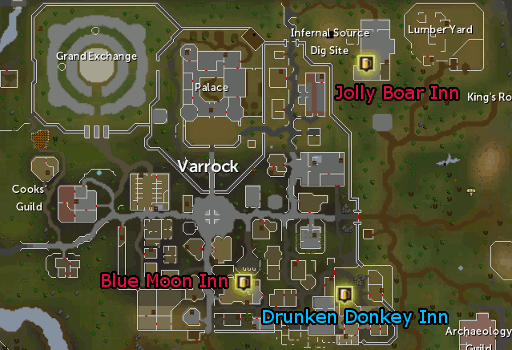 Image last updated: Feb 20, 2023 Update Image?
-
Relomia can be found at the Dancing Donkey Inn in South East Varrock (fenced-in area). Talk to her and she will get grouchy before attacking you with her wand. This will push you backwards several spaces, but otherwise cause no harm. As this will break dialogue, walk back up to her and continue the conversation. When she asks what she gets out of helping you, any answer will do. She will agree and teleport off to meet you at Death's hourglass.
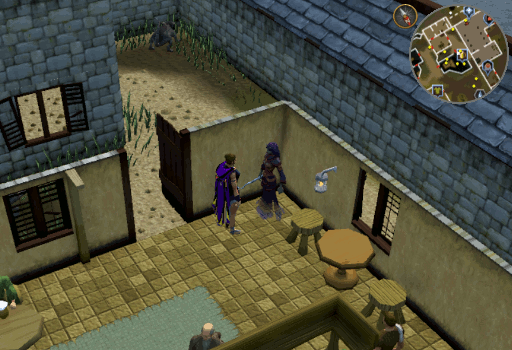 Image last updated: Feb 20, 2023 Update Image?
-
In preparation for this last portion, put all of your items in the bank. Once you have, return to $plnkfull3541's study and talk to him to begin your little act. Note that if you lobby or logout at any time during the mini-miniquest (before Relomia's victory), you will need to complete the entire encounter (steps 11 through 14) again by speaking with $plnkfull3541.
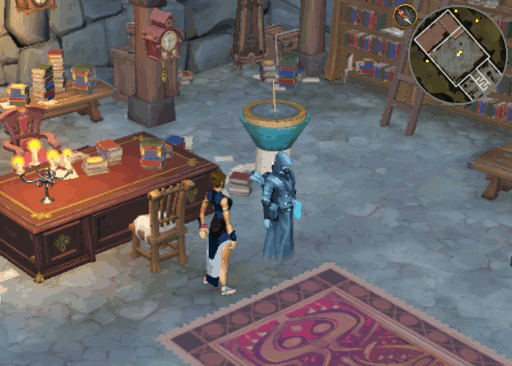 Image last updated: Feb 20, 2023 Update Image?
-
Upon starting, you will meet up with Relomia outside, near Death's hourglass. Death appear and provide the cover story, amongst several interruptions: someone has stolen a powerful artefact from him and has vanished into the trees. Once the task has been assigned, Death will vanish and Relomia will head for the trees to the West.
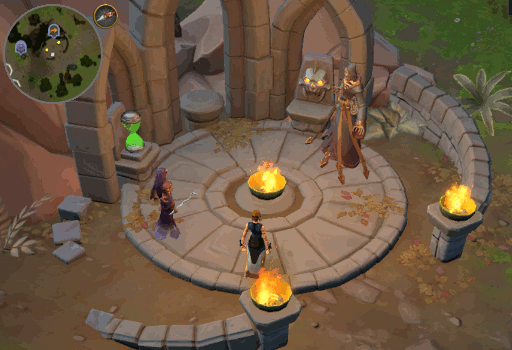 Image last updated: Feb 20, 2023 Update Image?
-
Upon encountering an "Evil goon" (one of the scarecrows), Relomia will stop and you must talk with her to proceed. $plnkfull3541 will begin to narrate the quest (just go with it) and describe the enemy which Relomia will then attack, though she will remain fairly unconvinced by the "enemies". As each goon is dispatched, she will progress to the next location where you will need to speak with her again.
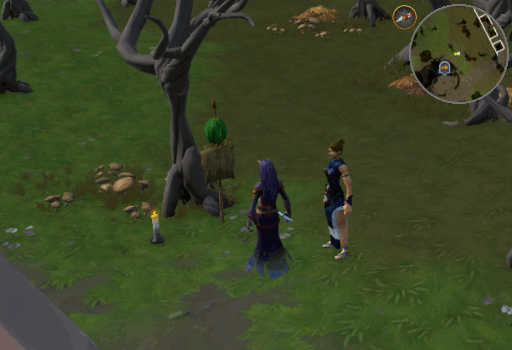 Image last updated: Feb 20, 2023 Update Image?
-
After the last one is destroyed, she will find the $ilnkfull31761! Speak to her once more and, after you mutter to yourself a bit, your character will understand that you are meant to pose as the mastermind thief for Relomia to cut you down.
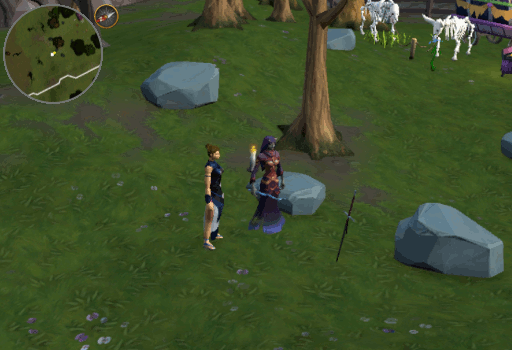 Image last updated: Feb 20, 2023 Update Image?
-
This fight is safe, has no stakes, and is fairly boring. Before the fight breaks out, you will "reveal your villainy" and take away $ilnkfull31762, she will draw the $ilnkfull31761 and the fight will commence. Your combat level is irrelevant, as the $ilnkfull31761 will constantly heal her whenever she drops below about 2,000 of her 3,000 hitpoints. The wand that you took from her supplies infinite air runes, so you can cast any standard spellbook air spell and use magic abilities, but eventually the it will break. After that point, Relomia will eventually "defeat you" and claim her reward from Death. Alternatively, you can just stand there and take the damage or punch her until she "kills" you.
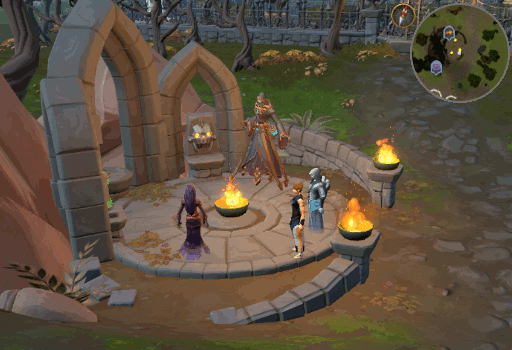 Image last updated: Feb 20, 2023 Update Image?
-
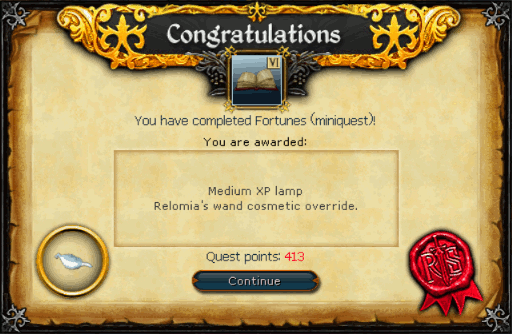
Once Relomia has impatiently received her reward and left, $plnkfull3541 will take you to his study to get you patched up. A short conversation later, you will complete the miniquest and receive your reward.
 Image last updated: Feb 20, 2023 Update Image?
Congratulations, Fortunes segment complete!
Finale
-
Within $plnkfull3541's study, speak to him to get back to your story. Unfortunately, you will almost immediately be interrupted by "Relomia, Time Guardian" who seems to have messed things up a smidge – one or two people MAY have died in a quest or two.
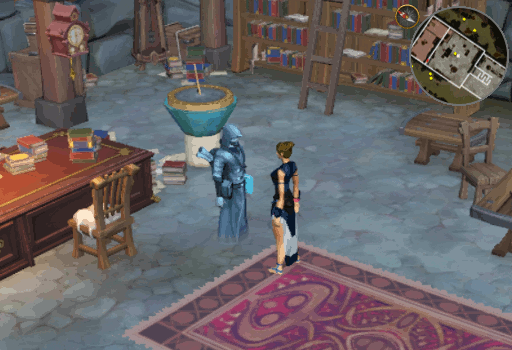 Image last updated: Feb 20, 2023 Update Image?
-
You will now need to assist Relomia, amongst a plethora of supposed spoilers about the future, in making changes to avert the deaths of her friends and enable her to successfully complete her quests.
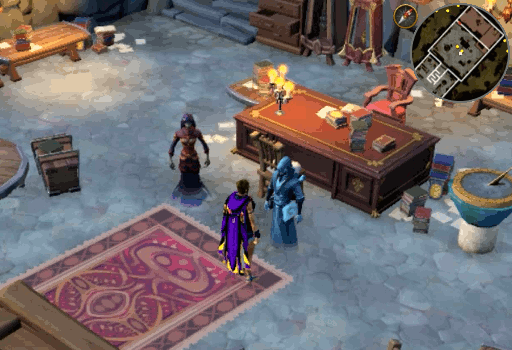 Image last updated: Feb 20, 2023 Update Image?
-
Head to $plnkfull3541’s lobby and speak to one of the 3 guests in any order: Kami, $plnkfull3057, and $plnkfull273 – as per RHQ style, we will visit them alphabetically (and conveniently West to East).
Speaking to each person in the lobby will enable you to enter Relomia’s memory of the quest where things went awry. Much like in Flashback, you will need to interact with 3 areas of any given memory as well as with Relomia to assign tasks to 4 characters. Failure to select the right character for the job will display an unsuccessful cutscene of events, the mission will fail, and you will be able to reassign tasks. Note that you cannot watch the cutscene until all 4 tasks have been assigned. Also be aware that Relomia is the only one you can talk to within the memories, though you can click the others to learn more about them from Relomia’s perspective.
-
Kami
-
Talk to Kami. This memory takes place in the Arc where they are attempting to defeat a band of criminals by creating a ne- whoops spoilers apparently.
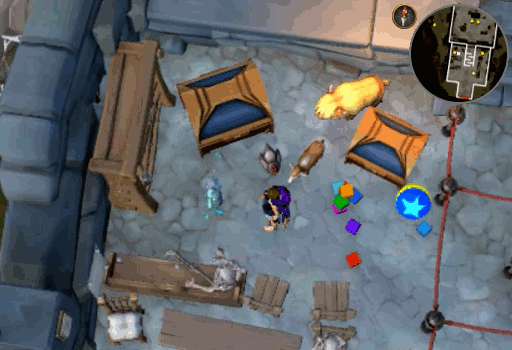 Image last updated: Feb 20, 2023 Update Image?
-
Assign the characters as below by interacting with the location and selecting the appropriate one.
Task Location Character Fend off Tiger Claw Right click Relomia – “assign free agent” Fraji Intricate lock Center of the area Honovi Big door North of the lock Kami Strange symbols East of the lock Sojobo - Once all 4 have been assigned, speak to Relomia to play back memory.
- Once complete, you will return to the study and need to speak with Kami again. This will cause her to vanish and you can continue.
-
Talk to Kami. This memory takes place in the Arc where they are attempting to defeat a band of criminals by creating a ne- whoops spoilers apparently.
-
$plnkfull3057
-
Talk to $plnkfull3057. This memory takes place at the "Grey Knights" Fortress where they are attempting to break into the building.
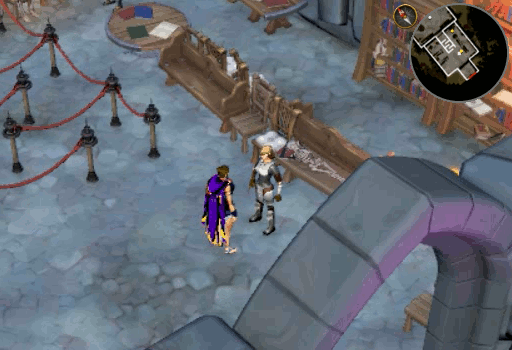 Image last updated: Feb 20, 2023 Update Image?
-
Assign the characters as below by interacting with the location and selecting the appropriate one.
Task Location Character Roof access Stool South East of bridge Captain Higgs Black Knight patrol Black knight standing South West of bridge Eva Cashien Sneak in through the front Front door Meg Delay Sutcliffe’s return Right click Relomia – “assign free agent” The Raptor - Once all 4 have been assigned, speak to Relomia to play back memory.
- Once complete, you will return to the study and need to speak with $plnkfull3057 again. This will cause her to vanish and you can continue.
-
Talk to $plnkfull3057. This memory takes place at the "Grey Knights" Fortress where they are attempting to break into the building.
-
$plnkfull273
-
Talk to Phillipe. This memory takes place at the World Gate where they are attempting to stop "Bright Inquisitor".
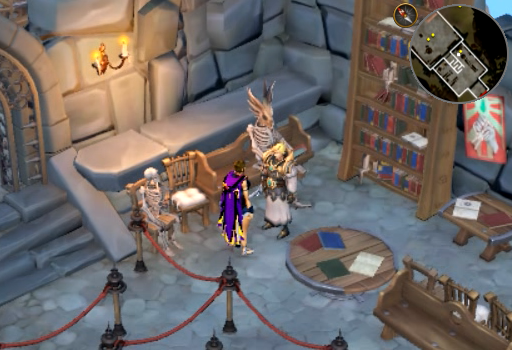 Image last updated: Feb 20, 2023 Update Image?
-
Assign the characters as below by interacting with the location and selecting the appropriate one.
Task Location Character Defend the gate West gate pillar Commander Zilyana Attack him and blast him through the gate Bright Inquisitor Nymora Taunt Bright Inquisitor Right click Relomia – “assign free agent” Oreb World Gate controls Gate dials Phillipe - Once all 4 have been assigned, speak to Relomia to play back memory.
- Once complete, you will return to the study and need to speak with Phillipe again. This will cause him to vanish and you can continue.
-
Talk to Phillipe. This memory takes place at the World Gate where they are attempting to stop "Bright Inquisitor".
-
Kami
-
With all 3 visitors from the lobby removed, return to Relomia and $plnkfull3541 and speak to either of them. As much as Relomia supposedly appreciates your help, she has places to go and things to do so she will run off after a short discussion. Speak with $plnkfull3541 again to complete your discussion.
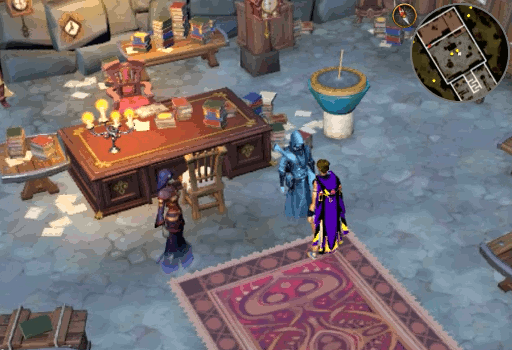 Image last updated: Feb 20, 2023 Update Image?
Congratulations, Finale segment complete!

Once Upon a Time in Gielinor Series completion
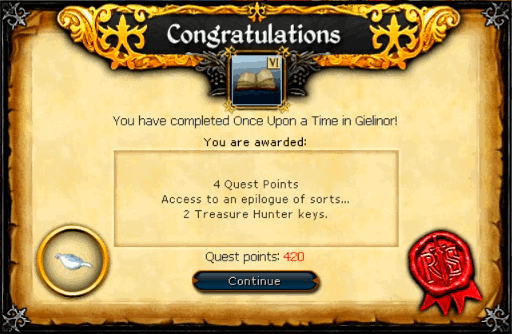
Speak to $plnkfull3541, yet again, and after a brief discussion will comment about how drained he is and how much he needs a break. This will conclude the entire series and award you the post series rewards (4 Quest points, access to the epilogue (below), and 2 TH keys).
Epilogue
-
Talk to $plnkfull3541, for the last time in this series, and he will agree with himself that a break is within order - "would you mind keeping an eye on things while I'm taking a break?" Unfortunately, he won't give you a choice as he will immediately teleport off. But now is your chance!
Image last updated: Feb 20, 2023 Update Image?
-
Enter the door to the North West and enter $plnkfull3541's personal space. Within this room you will find some drawers just East of the door. Invade his privacy (look in the drawers) and you will find a clue scroll – I knew he was holding out on me! Reading the clue scroll will point you to Relomia.
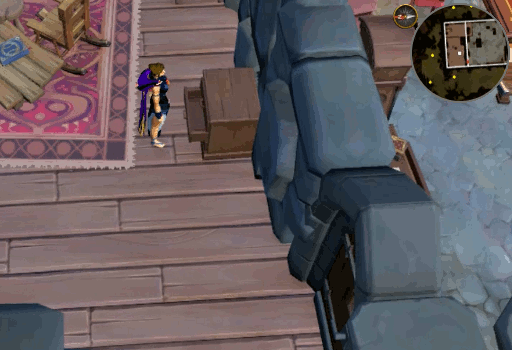 Image last updated: Feb 20, 2023 Update Image?
-
Travel to Draynor and speak with her just North West of the Old Man's building. She will exchange the scroll for the next one which has a riddle.
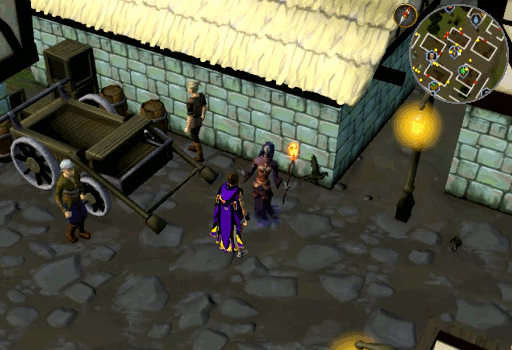 Image last updated: Feb 20, 2023 Update Image?
-
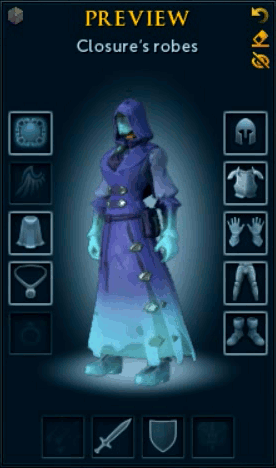
Right click the scroll and choose dig. This will present you with a Reward casket containing the “Ghostly undergarment” cosmetic override!
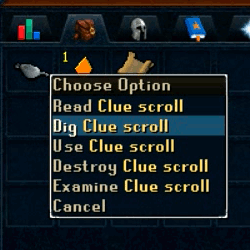 Image last updated: Feb 20, 2023 Update Image?
Congratulations, Epilogue complete!
Rewards
Medium XP lamp, Relomia's party hat override, and 2 Treasure Hunter keys
Flashback:
Medium xp lamp and Closure's ghost book cosmentic override
Fortunes:
$ilnkfull22533 and Relomia's wand cosmetic override.
Finale:
Medium XP lamp, 'Shadow Rip' Home Teleport override as well as access to an "epilogue of sorts" and 2 Treasure Hunter keys for completing the series.
Guide Credits & History
| Writers | 3ter and ChathMurrpau |
|---|---|
| First Uploader | Chath |
| Date Added | Dec 05, 2021 |
| Last Updater | KsbSingle |
| Last Updated | Feb 20, 2023 |
Guide Feedback
Rate this guide
You can report issues without logging in. Log in to leave ratings and watch pages.
Want to help keep RuneHQ's guides up to date?
We're always looking for knowledgeable players to write, review, and improve our content. Join the team and help thousands of adventurers.