Ode of the Devourer
Quest Details
| Difficulty | Novice |
|---|---|
| Type | Quest |
| Length | Medium-Long |
| Quest Points | 1 |
| Members | Yes |
Start Point
Requirements
Quest Requirements
Items Needed
| Combat gear | teleport method for Het's Oasis | Fairy Ring access |
Walkthrough
-
Head to Fort Forinthry and read note on the Cabbage Dummy where $plnkfull903 usually is. Accept the quest. You'll learn that he went out to gather some supplies, but it seems to have taken him longer than it should.
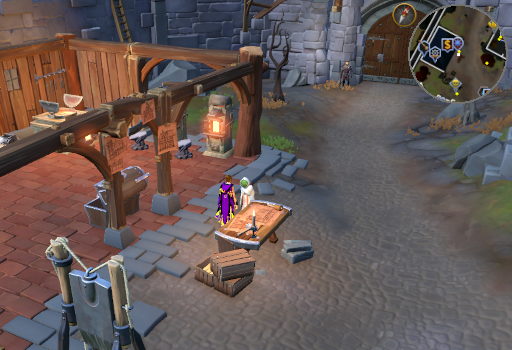 Image last updated: Sep 29, 2024 Update Image?
-
Head to the Command Centre and talk to $plnkfull3551 about the quest. She will tell you that he went to get his supplies Al Kharid.
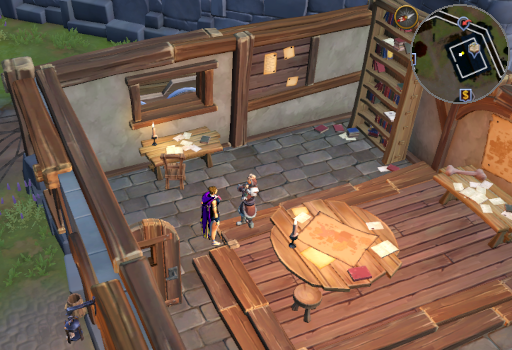 Image last updated: Sep 29, 2024 Update Image?
-
Ensure that you are geared for combat, you will be facing $mlnkfull2242 and $mlnkfull2237, then teleport to Al Kharid. When ready, enter the quest icon near the lodestone to continue. A brief cutscene of the current situation will play. The entire city is overrun by Soul devourers and the citizens are fighting back... some more than others.
Note: Despite having a Slayer level requirement of 107 and needing $ilnkfull28766 to normally kill them, you do not need either of them for this quest. You will be able to harm them like any other monster.
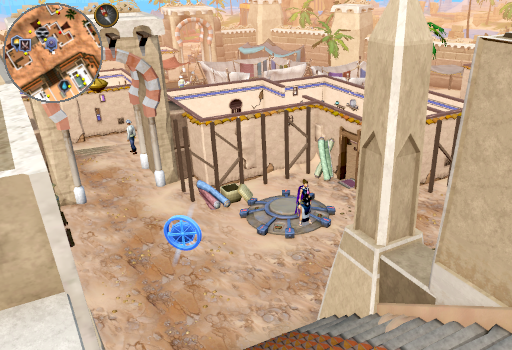 Image last updated: Sep 29, 2024 Update Image?
-
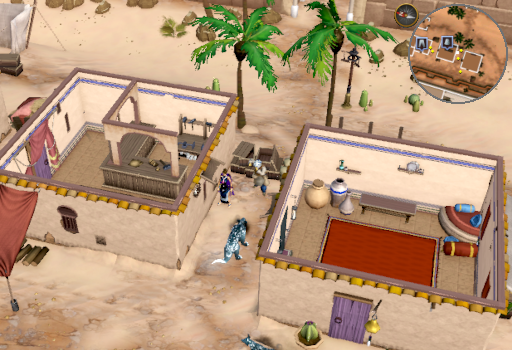
In the instance of Al Kharid there will be 6 $mlnkfull2242’s roaming that you can fight and defeat OR ignore. Your main objective is to find and save 3 civilians by defeating the $mlnkfull2237 attacking them and then clicking on the civilian to save them.
Who Where Map (click for large image) $plnkfull685 East of the palace, South of the plateskirt shop 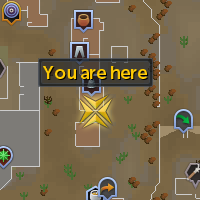 Image last updated: Sep 29, 2024 Update Image?
Ayesha directly North of the hide tannery 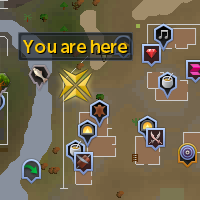 Image last updated: Sep 29, 2024 Update Image?
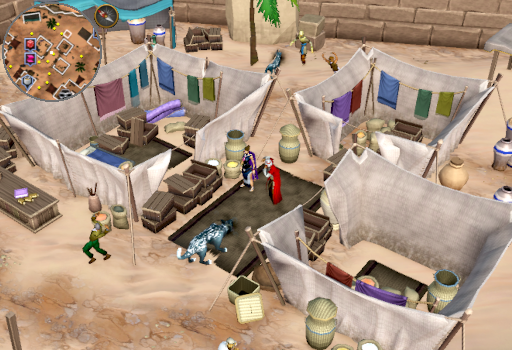
$plnkfull65 between the trio of tents East of the silk trader's stall  Image last updated: Sep 29, 2024 Update Image?
 -
With all 3 civilians saved, head West of the palace and South of the bank. Crawl under the cart where $plnkfull903 and Father Salman are cornered by the final $mlnkfull2237 (you cannot be in combat when crawling). Defeat it and talk to $plnkfull903. He will not be very coherent, but Father Salman will fill you in: $plnkfull903 was bitten by the $mlnkfull2237 and contracted its curse. Most people under the curse's effect are consumed by it, soul and all. He will remain with the afflicted while you search for a cure.
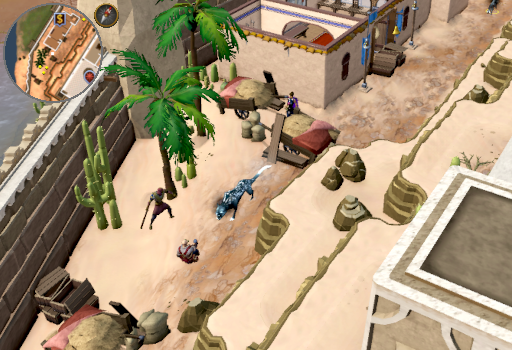 Image last updated: Sep 29, 2024 Update Image?
-
Make your way to the Sanctum of Rebirth and enter the quest icon. Talk to $plnkfull576 and he will tell you that you need to check on the Gate of Elidinis at the apex of the Sanctum. He'll take you there and it will be revealed that the Devourer's corruption has taken hold of the Gate. You can ask for more information about Amascut, the Gate, and Elidinis, but you don't have to. When done asking any questions you want to, choose to continue the quest (option 4).
Note: Sanctum can be quickly accessed by a Boss portal in either the Max Guild or War's Retreat. Alternatively, you can board the gondola at the City of Um Northern docks, near the Suspicious stranger.
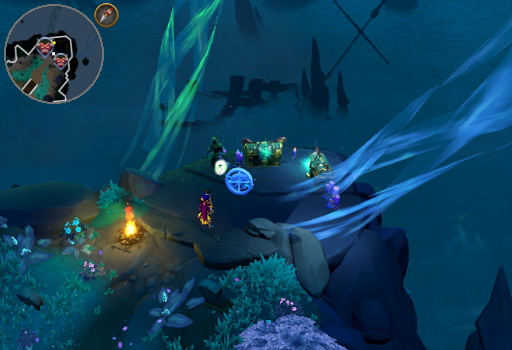 Image last updated: Sep 29, 2024 Update Image?
-
Head to the Fort and go down the floor hatch East of the Command Centre, continuing the quest when prompted. Talk to $plnkfull2891 and he will agree to help you on the condition that he gets to come along for the ride. You are given 2 tasks: to head to the Mahjarrat Ritual Site and Find an Amascut Idol. You will be asked which you want to do first. The order doesn't matter.
Note: if you log out, lobby, or hop worlds while $plnkfull2891 is accompanying you, you will need to recollect him from the prison to proceed.
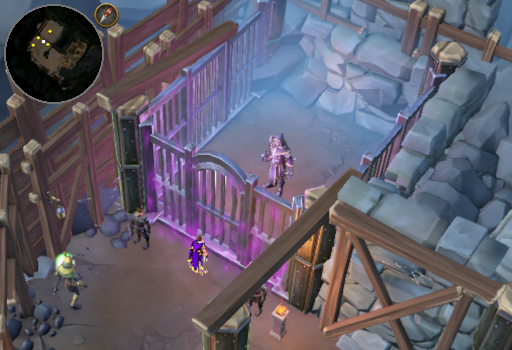 Image last updated: Sep 29, 2024 Update Image?
Finding the Idol
-
Head into the desert South West of the Kalphite Lair (North of the Bandit Camp) to the large Amascut statue head. Enter the quest icon and talk to $plnkfull576. You will be given more exposition about his relationship with Amascut and their parents; you can choose to have the short, medium, or long version of the story and can choose to ask additional questions.
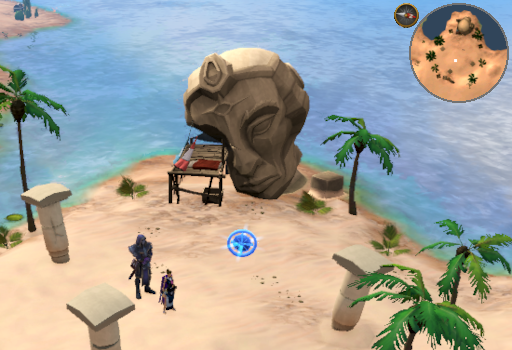 Image last updated: Sep 29, 2024 Update Image?
-
Head to Het's Oasis and enter the quest icon near Al Kharid’s North gate for further dialog. You will learn that there is an Idol of Amascut within the walls of the city. Because of $plnkfull576's promise to not interfere with the living, you will have to part ways here.
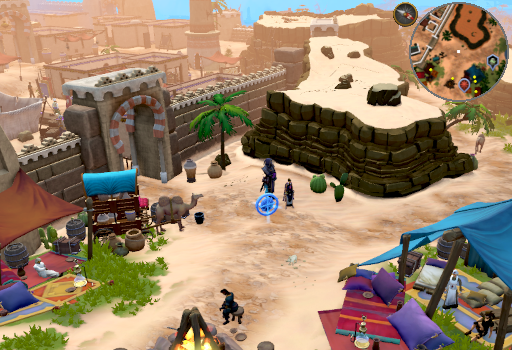 Image last updated: Sep 29, 2024 Update Image?
-
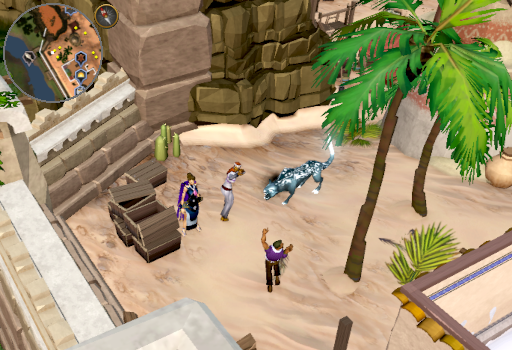
Go just North of the scimitar shop and talk to Father Salman. When you explain the situation, he suggests checking with $plnkfull685 to see if he has the idol.
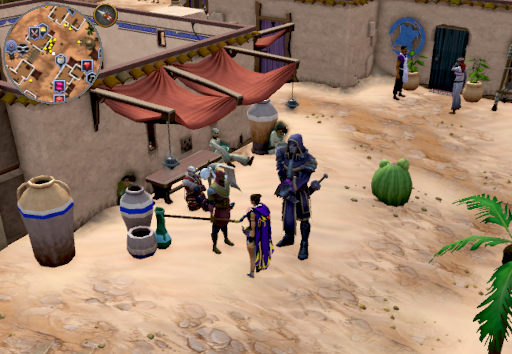 Image last updated: Sep 29, 2024 Update Image?
-
Talk to $plnkfull685 in North East corner. He will tell you he already has a buyer for the idol and they left a hefty deposit up front. You can try to persuade him if you like, but this won't work.
 Image last updated: Sep 29, 2024 Update Image?
-
Move some distance away (anywhere West of where $plnkfull685 usually sets up his shop will do fine, as will further South than the palm tree nearby) and talk to $plnkfull2891 to decide what to do next. He'll suggest convincing the town that the idol is the reason the soul devourers attacked in the first place.
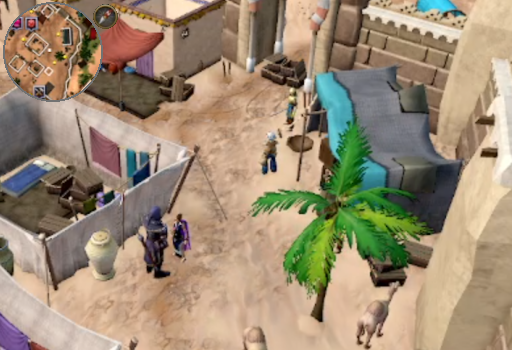 Image last updated: Sep 29, 2024 Update Image?
-
Move around town and talk to any civilian with the talk option (locations in map below) to spread rumors to 5 of them. Each time you rile up one of the civilians they will run over to $plnkfull685 and start bothering him.
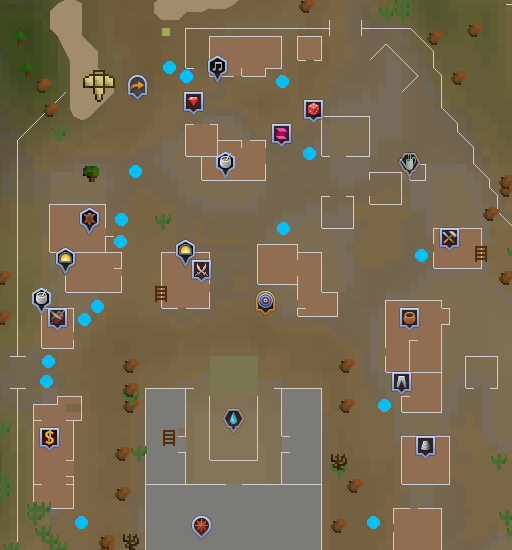 Image last updated: Sep 29, 2024 Update Image?
-
With $plnkfull685 suitably harassed, talk to him once more to receive the idol.
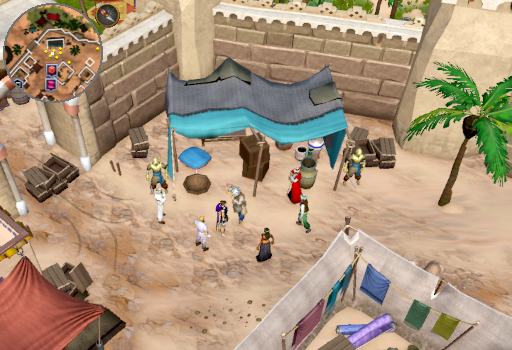 Image last updated: Sep 29, 2024 Update Image?
-
Return to Father Salman to let him know mission accomplished.
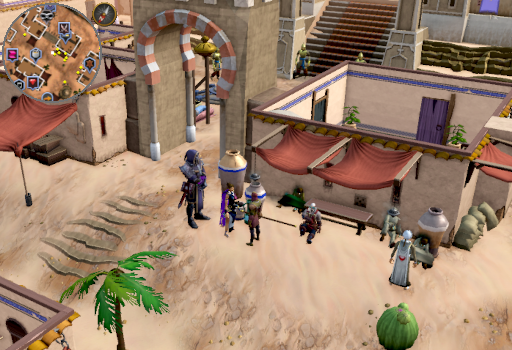 Image last updated: Sep 29, 2024 Update Image?
The Ritual Site
-
Head to the Mahjarrat Ritual Site and enter the quest icon. You'll find the marker surrounded by dead forgotten warriors suffering from magic reminiscent of the magic surrounding $plnkfull3015 when he went to claim Vorkath's soul on Ungael.
Note: Fastest routes to the Mahjarrat ritual site include Fairy ring (D - K - Q), Ancient spellbook teleport to Ghorrock (8 $ilnkfull1111 and 2 $ilnkfull591), or the canoe in the snowy Fremmnik hunter area.
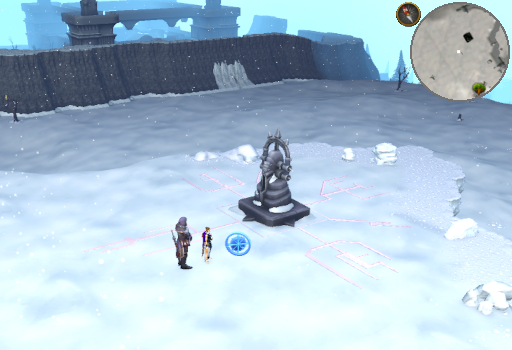 Image last updated: Sep 29, 2024 Update Image?
-
Talk to $plnkfull576 or $plnkfull2891 to find out what happened. $plnkfull2891 will tell you that what you need from the marker is probably why Vengeance's forces are here in the first place.
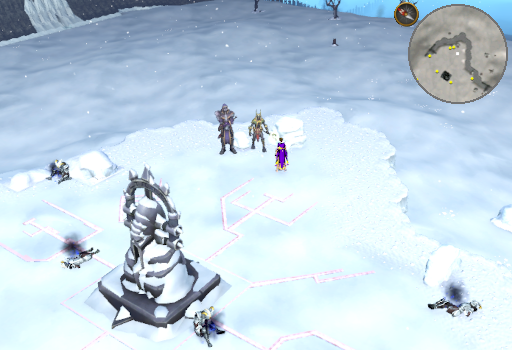 Image last updated: Sep 29, 2024 Update Image?
-
Search the Forgotten Warriors until you find a Ceremonial Dagger and an Absorption Rune, then talk to $plnkfull2891 again.
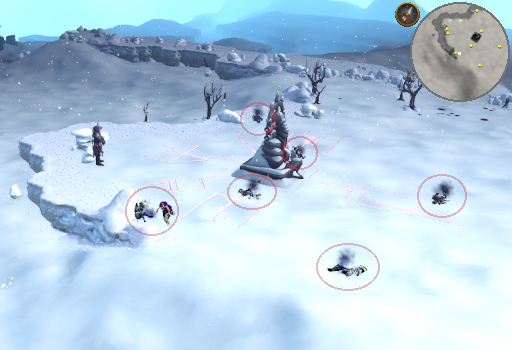 Image last updated: Sep 29, 2024 Update Image?
-
Use the Rune twice on the Marker to absorb the dark energy then use the dagger to pry out the Shard of the Gate. Note that if you fail at any point to obtain the shard that $plnkfull2891 will mock you because we didn't have enough reasons to dislike him already.
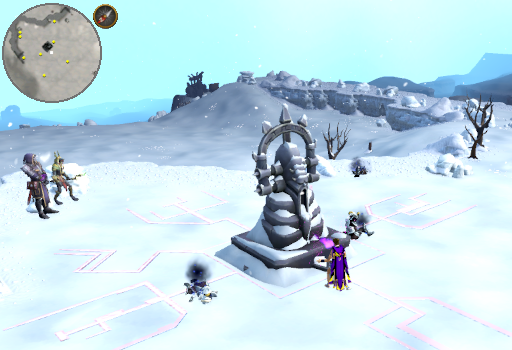 Image last updated: Sep 29, 2024 Update Image?
-
When you have obtained the shard, speak to $plnkfull2891 one final time.
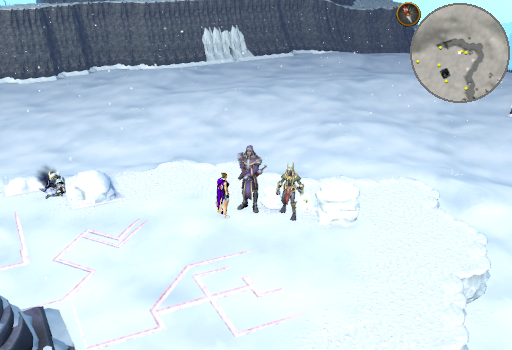 Image last updated: Sep 29, 2024 Update Image?
-
Head into the desert South West of the Kalphite Lair (North of the Bandit Camp) to the large Amascut statue head. Enter the quest icon and talk to $plnkfull576. You will be given more exposition about his relationship with Amascut and their parents; you can choose to have the short, medium, or long version of the story and can choose to ask additional questions.
-
With both the Idol and Shard in hand return to the Sanctum of Rebirth and enter the quest icon once more. Talk to $plnkfull576 and complete the dialog. Then, click receive blessing on either item to prepare for the fight ahead. At this point if you log/lobby/hop worlds you will no longer need to/be able to recollect $plnkfull2891.
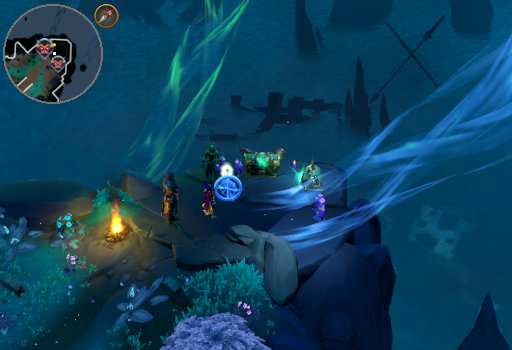 Image last updated: Sep 29, 2024 Update Image?
-
Prepare for a battle and enter the blue energy stream to reach the Gate of Elidinis. When you think you have an adequate understanding of the fight (see the section below), walk North slightly past $plnkfull576 and then click him to start the fight. Note that this is a safe death if you fail (too much damage OR corruption completely fills the bar) you will respawn near $plnkfull2891 and can begin again.
Gear
For the easiest fight, we recommend avoiding items that increase your lifepoint total as possible - such as Thermal bath and Bonfire boost. This is because the damage taken from the boss is a percentage based on your lifepoint total. Luckily, if done properly, it can be mitigated almost entirely by using Enhanced Excalibur and a Bunyip familiar. As far as gear goes, we recommend your best augmented pickaxe (any perks on it that improve your gathering rate will be beneficial), Tagga's Corehammer, and the Magic golem outfit. At least half of your inventory should be empty, as you will need the space for items you gather during the fight. The remaining space should be dedicated to food.
Note that as the fight is the typical toned down for quest version, you COULD wear your Deathwarden gear and bring your Necromancy weapons to be prepared for the Amascut fight which occurs right after defeating the Gate, but this is unnecessary as you can teleport out and not have to fight the Gate again.
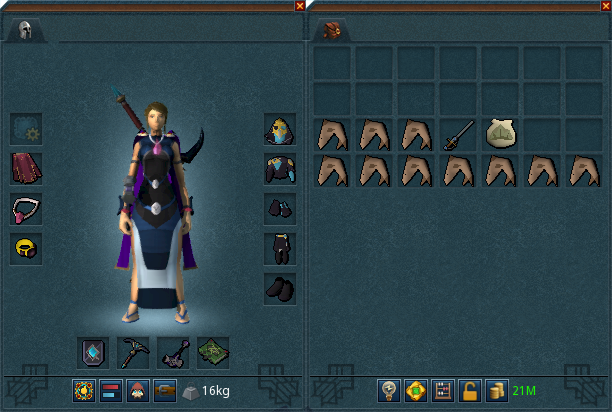 Image last updated: Sep 29, 2024 Update Image?
The Arena
The fight for the Gate of Elidinis takes place in an oblong triangular chamber. You will enter from the center of the South side. The Gate of Elidinis sits in the corner opposite from that wall. The chamber is bisected about halfway between by a barrier. This barrier mitigates some of the power Amascut has to fight against you if repaired with Moonstone fragments. Along the walls on the South side of the barrier are several nodes of moonstone where you can obtain these fragments. When the fight starts, you will have 17 seconds to obtain Moonstone fragments while Amascut's corruption begins to manifest. Once it does, about 12 Corrupt shards of Elidinis will shoot out of the gate landing both North and South of the barrier. Many of the attacks you will need to avoid revolve around the barrier or the Shards of Elindis. As the fight progresses, The Gate will accrue 25 Corruption per tick and additional bouts from Soul Devourers (details below). If the bar fills completely, you will be killed and the encounter will need to restart.
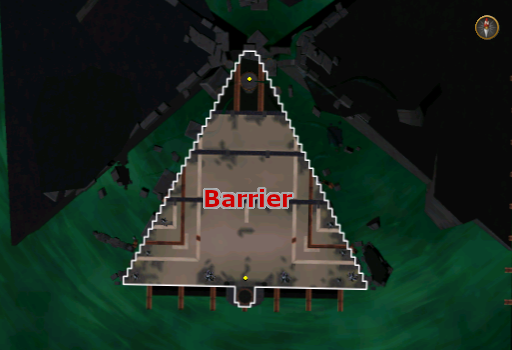 Image last updated: Sep 29, 2024 Update Image?
Your Foe's Powers
In this section we will lay out all the ways Amascut's influence can damage you. All damage you take in this encounter is typeless, and thus cannot be mitigated or negated by way of protection/deflection prayers, nor by way of Resonance or Divert.Corruption
Once you begin transmuting the Corrupt shards of Elidinis, you will begin to gain stacks of corruption. Each pile of shards will earn you 10 corruption when completely cleansed. Each time you gain one, you will take some damage. The amount of damage scales with the amount of corruption you have accumulated.Counterstrike
Upon dealing damage to Amascut's corruption with the help of Icthlarin's Aid (pillars), the moonstone barrier's shield will drop to 0%. Amascut will then charge up an attack that can kill you instantly. Standing in the green circle will both heal you and protect you from the ko.Corruption Bolt
While you are standing North of the barrier, Amascut will fire a bolt of corruption from the Gate roughly every 4 seconds, targeting where you are standing when it fires off (indicated by blue square). When it lands, it deals about 800 damage to anyone standing in the area and applies 2 stacks of Corruption.
Attack Rotation
Outside the mechanics outlined above, Amascut's influence has a set attack rotation that it follows. Under the bar that indicates the strength of the Moonstone barrier is another bar that indicates Amascut charging for the next attack. When it reaches the associated count, the attack will begin.-
Begone
This attack has a count of 10 before it begins. Once it starts, all the corruption from the Shards of Elidinis will be called back to the Gate. After a short delay, a bolt of corruption will fly towards you. It will home in on its target, meaning you cannot dodge it. Base hit without any barrier protection is about 14% of your max health (2131 damage at 15,552 health). If it passes through the barrier it will reduce the strength of the barrier by 30% and reduce the damage you take by 30% (about 640 at 15,552 health). -
Rot and Suffer
This attack has a count of 7 before it begins. Once it starts, 6 bolts of corruption will shoot out toward the Shards of Elidinis (corrupted and cleansed). After a short charge time, pulses of corruption will erupt from them, dealing damage to anyone within the area around the node (indicated by squares) and giving you a stack of 5 corruption. The Corruption will then try to jump to another nearby node and the pulses will go off again; this may occur a third time. If no nodes are near one of the pulses, then that Shard of Elidinis will only pulse a single time and the corruption will fail to move to a new Shard of Elidinis. -
Children to me!
After Rot and Suffer, she will summon 0-3 Feline akh - indicated by "Children to me!" being yelled. They will heal the influence of Amascut by giving up their own lifepoints (333 per tick). However, they only have 15,000 lifepoints to give. Furthermore, you can deal 7,500 damage to them per Moonstone fragment by clicking to dismiss them - requires 2 to kill remove them. This should always be done as fast as possible.
How to Win
Your goal is to cleanse Amascut's corruption from the Gate. There are Moonstone crystals around the arena's edge that can be gathered and used to repair the moonstone conduits (shared hp between all 4) which create a shield that make the back half of arena (South of the barrier) take less damage. Note the barrier will block the "Begone" hit only up to 30% so you just need to make sure it stays above that (does not need to be kept at 100%). The Gate will throw Corrupted Shards of Elidinis all around the arena. You must first transmute these shards to cleanse them, then mine the pile to receive Cleansed statue shards. When you have several shards in your inventory you must run to the front half of the arena and cleanse the gates (click the gate repeatedly, 1 per shard). This damages its health 3k and consumes the shards. While doing this, the Gate will attack you as detailed above.
Indtead of running to the cage, you can click the extra action button which causes Icthlarin to move 4 pillars temporarily for you to jump up when cleansing the gate - make sure you have several Cleansed statue shards before doing so! 1 click per pillar, lowest to highest. Using the pillars consumes your shards in 1 go and also gives a 5-25% damage bonus if you do them quickly. She will then charge an instakill attack. This can be avoided, and you'll get fully healed plus some corruption removed (anout 1.5 per shard), by entering the green protection zone Icthlarin summons.
-
After the gate is defeated continue to the dialog until you are dragged to the Shadow Sands. You are going to start a fight with more of Amascut's minions. When the fight starts, you can teleport out to regear for the fight if you prefer. If you do, return to the Sanctum of Rebirth's reward chests and click the quest icon to continue.
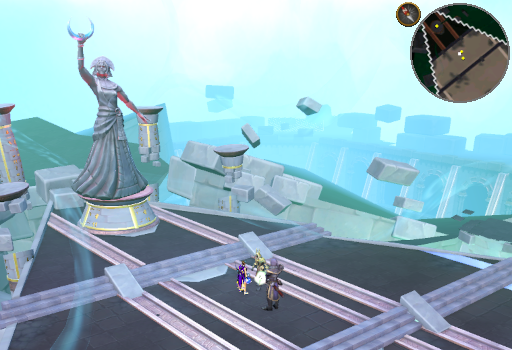 Image last updated: Sep 29, 2024 Update Image?
-
In the Shadow Sands Amascut will summon waves of Akhs of increasing difficulty to fight you, 3 soul devourers at a time. She also periodically fires off an instakill attack for which $plnkfull576 will again provide a protection zone. You can see how soon the attack will go off by watching the progress bar that reads, "Souls devoured" with a countdown or just keeping an eye out for the protection zone. After 4 waves of soul devourers the fight is won.
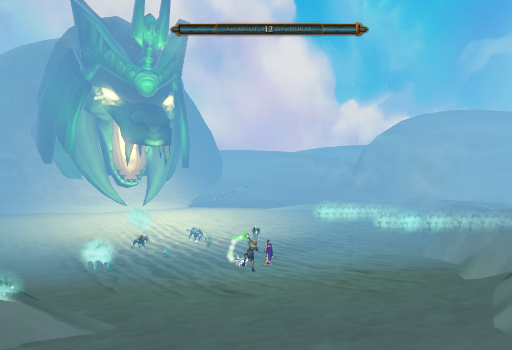 Image last updated: Sep 29, 2024 Update Image?
-
Continue the dialog with $plnkfull2891 and $plnkfull576 at the gate. When it ends, you will be placed outside near the rewards chests.
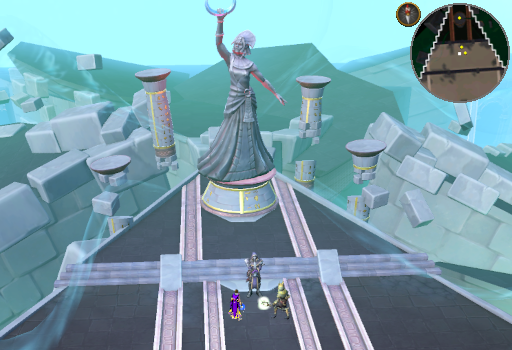 Image last updated: Sep 29, 2024 Update Image?
-
Return to the floor hatch behind the Command Centre to return $plnkfull2891 to his cell - now decked with the requested adornments. Talk to $plnkfull903 near the cell to complete the quest.
 Image last updated: Sep 29, 2024 Update Image?
Congratulations, Quest Complete!
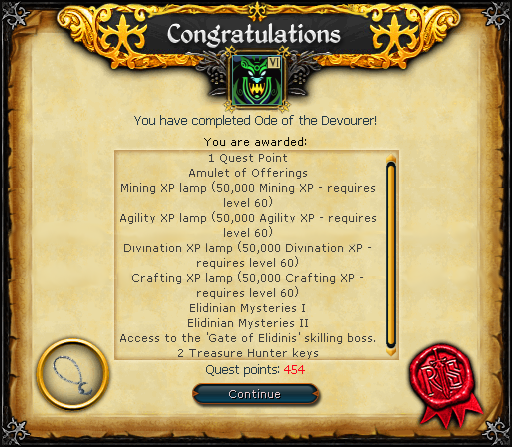
Image last updated: Sep 29, 2024 Update Image?
Rewards
Amulet of Offerings;
Mining lamp (50k, requires lvl 60);
Agility lamp (50k, requires lvl 60);
Divination lamp (50k, requires lvl 60);
Crafting lamp (50k, requires lvl 60);
Elidinian Mysteries I;
Elidinian Mysteries II;
Access to the Gate of Elidinis skilling boss (starting Sept. 23, 2024);
2 Treasure Hunter keys
Guide Credits & History
| Writers | Sy Accursed, 3ter 1, and ChathMurrpau |
|---|---|
| First Uploader | Chath |
| Date Added | Sep 21, 2024 |
| Last Updater | Chath |
| Last Updated | Sep 29, 2024 |
Guide Feedback
Rate this guide
You can report issues without logging in. Log in to leave ratings and watch pages.
Want to help keep RuneHQ's guides up to date?
We're always looking for knowledgeable players to write, review, and improve our content. Join the team and help thousands of adventurers.