Elemental Workshop IV
Quest Details
| Difficulty | Intermediate |
|---|---|
| Type | Quest |
| Length | Short |
| Quest Points | 2 |
| Members | Yes |
Start Point
Requirements
Skill Requirements
Quest Requirements
Items Needed
Items Acquired During Quest
Walkthrough
-
Search the northern bookcase in the Sorcerer's Tower and read the Notched book to start the quest. You will learn that there is another level hidden deep within the Elemental workshop for you to discover.
Note: The quickest way to get here would be to use the Ardougne cloak 3's or Ardougne cloak 4's teleports, which will put you just west of the tower.
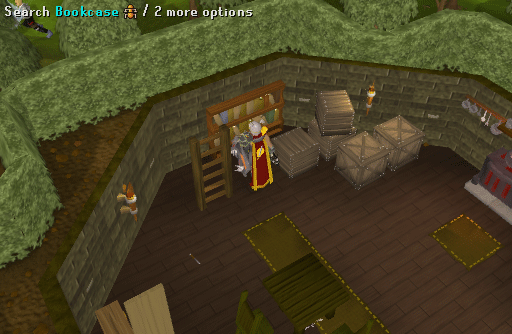 Image last updated: Jun 04, 2017 Update Image?
-
Head north to the anvils just west of Seers' Village Bank. Use your Knife on the whetstone there, while you have the Notched book in your inventory, to create a Keyblade.
Note: The easiest way to reach the elemental workshop is by using the Seers' Village lodestone network teleport.
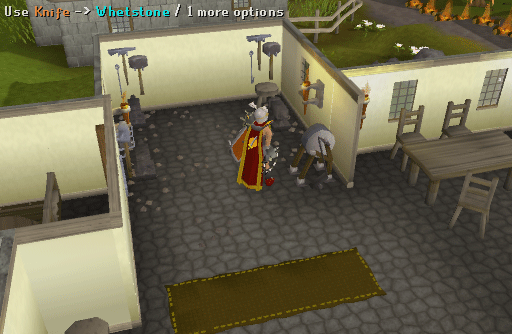 Image last updated: Jun 04, 2017 Update Image?
-
Now, go through the odd-looking wall and head down the stairs to enter the workshop. Climb down the hatch and stairs to the lowest level, and then head south. Go to the end of the hall and open the door using your Keyblade, then enter the Cosmic door directly to the east.
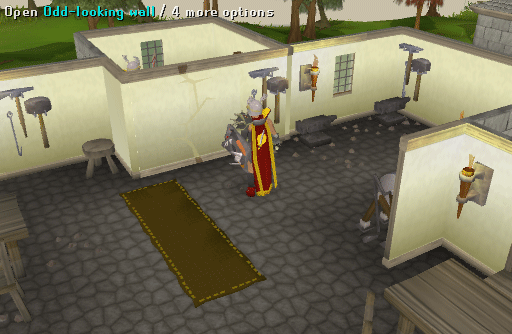 Image last updated: Jun 04, 2017 Update Image?
- You must now complete 3 puzzles to activate the Cosmic machine. The aim of the puzzle is to rotate the pillars so the colors are lined up with the rune emitters along the walls. Air = White, Water = Blue, Fire = Red, and Earth = Brown. To the southeast you will find a control panel that you must use to rotate the pillars and raise or lower the height of the emitters. In the control panel interface, the bottom right circle corresponds to the southeast pillar closest to you. Once the pillars are rotated and the emitters are in the correct position, you must ensure each emitter has the correct rune mounted. You can do by using the correct rune from your inventory on each emitter.
There are three puzzles total, each of increasing complexity. The first puzzle does not require any height changes to the emitters. Here are the solutions (the same for everyone)
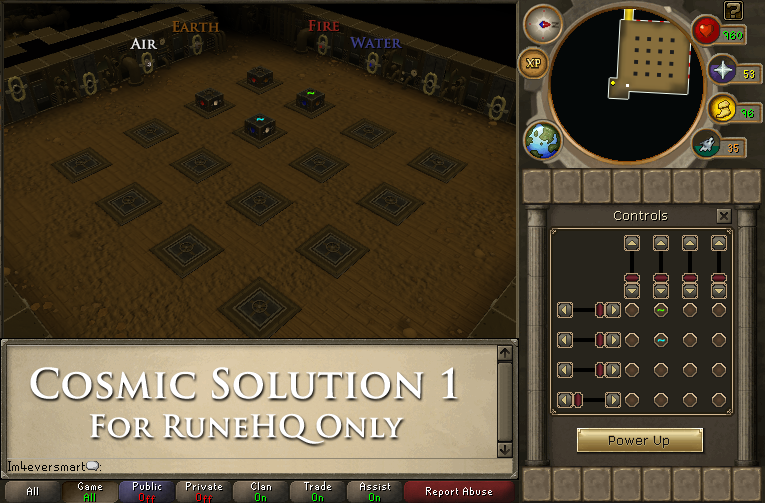 Image last updated: Jun 04, 2017 Update Image?
 Image last updated: Jun 04, 2017 Update Image?
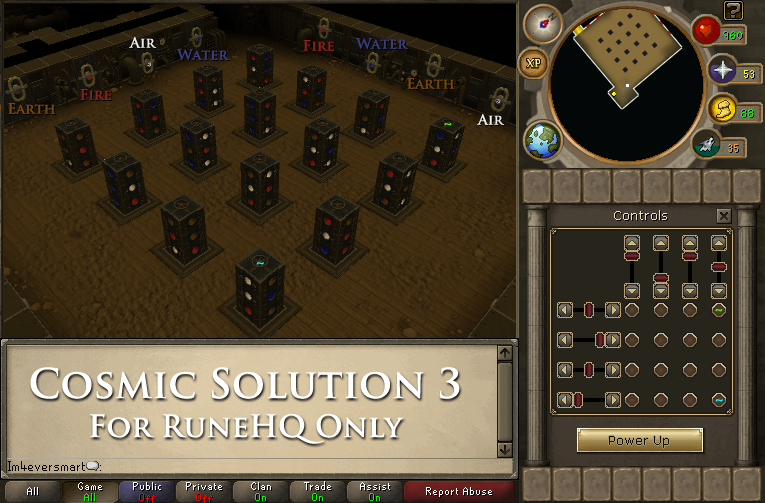 Image last updated: Jun 04, 2017 Update Image?
-
Once completed, operate the draining machine in the southeast corner and a cut scene will occur in which an Automaton will come to life and open the Chaos door down the hall.
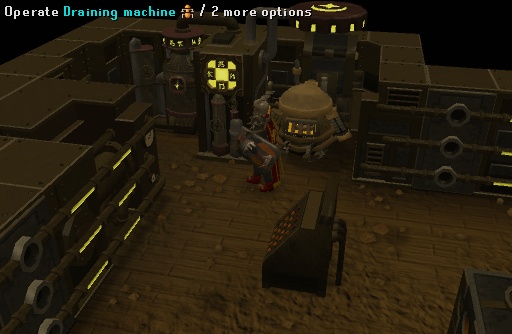 Image last updated: Jun 04, 2017 Update Image?
-
Before continuing on, you can save some time here if you already have a Primed bar. Use it on the machine and operate the control panel to power it. Then, you must operate the draining machine to create a Cosmic bar. Return upstairs to the anvils to create Cosmic gloves, which you will need later.
Note: Each time you operate the control panel you will not be able to power it again until the pillars are lined up. One pillar will have moved since the last time the machine was operated.
-
Go back downstairs to the main corridor with the Cosmic and Chaos doors, and then head south to the now-open Chaos room. Take the Shabby book in the northwest corner and read it. Within this room, your objective is to provide commands for the Automaton using the address and instruction cubes on the conveyor belt. You can move the cubes around the belt by pulling the four levers facing the eastern wall - the southern-most lever moves the cubes five spaces clockwise, the lever just north of that moves the cubes one space clockwise, the northern-most lever moves the cubes five spaces counterclockwise, and the lever just south of that moves the cubes one space counterclockwise.
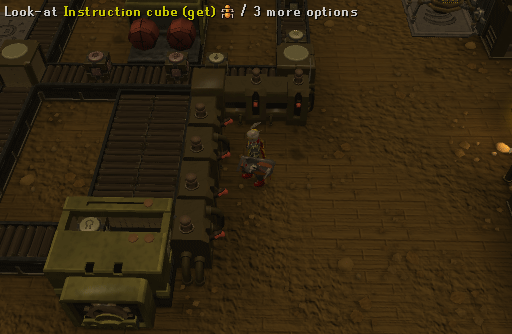 Image last updated: Jun 04, 2017 Update Image?
-
The goal is to move the cube you want in front of one of the red RAM pushers, and then pull the corresponding RAM lever (western lever for the western RAM, eastern lever for the eastern RAM). Once both address and instruction cubes are in the CPU, the Automaton will perform the command. Below is the correct command sequence:
- Get + Nature
- Put + Mind
- Break + Law
- Get + Cosmic
- Put + Mind
- Get + Fire
- Put + Water
- Get + Body
- Put + Mind
- Get + Astral
- Put + Mind
- Break + Earth
- Operate + Chaos
-
These commands will break the second wall and turn on the machine. Equip the Cosmic gloves and then use the Primed bar with the table. Operate the draining machine to get a Chaos bar.
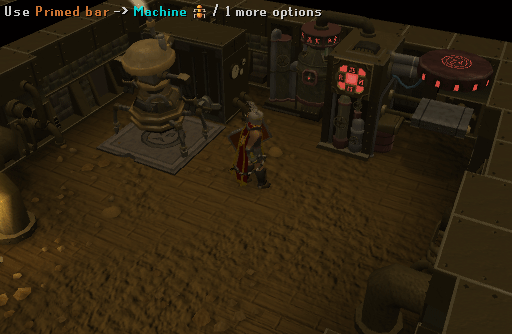 Image last updated: Jun 04, 2017 Update Image?
-
Finally, head back upstairs and use the Chaos bar with the anvil to create Chaos boots.
Congratulations! Quest Complete!
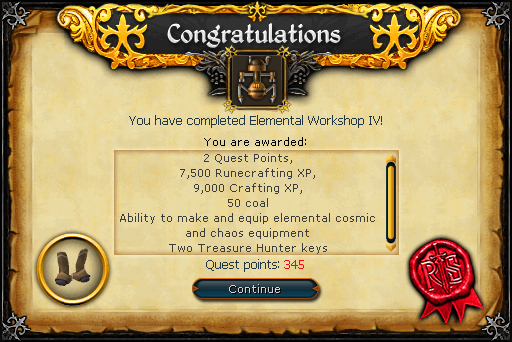 Image last updated: Jun 04, 2017 Update Image?
Chaos and Cosmic Armor:
Upon completion of the quest, you can make the rest of the Chaos or Cosmic armor sets by getting more Primed bars (2 for body, 1 for helmet, 1 for shield, 1 for gloves, and 1 for boots) and using them with the powered Cosmic or Chaos draining machines. The Cosmic draining machine will drain your Runecrafting level each time, and requires 39 Runecrafting points to be operated. The Chaos draining machine will drain your Thieving levels each time, and requires 39 Thieving points to be operated. Therefore a Super restore potion is recommended if you wish to make full Cosmic or Chaos armor.
Rewards
Guide Credits & History
| Writers | Haevens Vibe and Im4eversmart |
|---|---|
| Contributors | Coyote Track, Ceielo, Bob, Slasher20007, DJSpahn, and Killa2Wicked |
| First Uploader | Im4eversmart |
| Date Added | Mar 01, 2011 |
| Last Updater | Alfawarlord |
| Last Updated | Jun 04, 2017 |
Guide Feedback
Rate this guide
You can report issues without logging in. Log in to leave ratings and watch pages.
Want to help keep RuneHQ's guides up to date?
We're always looking for knowledgeable players to write, review, and improve our content. Join the team and help thousands of adventurers.