Song from the Depths
Quest Details
| Difficulty | Novice |
|---|---|
| Type | Quest |
| Length | Short |
| Quest Points | 1 |
| Members | No |
Start Point
Requirements
Skill Requirements
Items Needed
Items Acquired During Quest
Walkthrough
-
Head over to Lucille's house, west of the well in Rimmington, and talk her. She will tell you that she has been trying to wake up her husband, Waylan, who for some reason will not wake up but keeps muttering in his sleep. Lucille will then inform you that the same thing is happening to the other men in the village and will ask you to help her figure out what caused this. Offer to help her and she will hand you a Restless sleep potion.
Note: The easiest way to reach Rimmington is by using the Port Sarim lodestone and then walking west or by using the Skills necklace to teleport to the Crafting Guild and then running South.
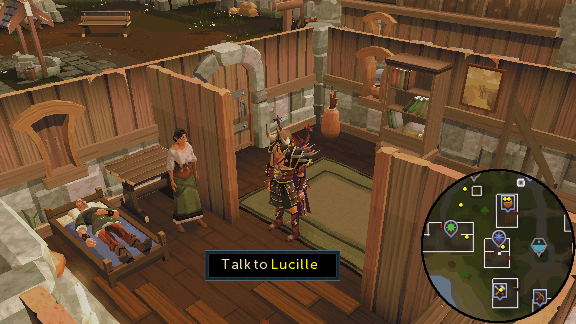 Image last updated: May 22, 2018 Update Image?
-
While still inside Lucille's house, drink from the Restless sleep potion. You will fall asleep and wake up in a dream-like state. Step outside and you will see the purple souls of the men of Rimmington leaving the village. Follow the souls until you reach a cave entrance, South of the Rimmington Mine, and enter the cave.
Note: If you log out during the rest of the quest, you will reappear in Lucille's house and wake up from the dream. If leave Rimmington, you will wake up as well but will not reappear in Lucille's house. When this happens, ask Lucille for another Restless sleep potion and drink it. You will reappear where you left off.
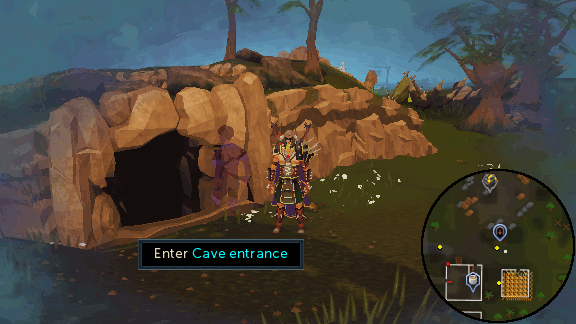 Image last updated: May 22, 2018 Update Image?
-
Once inside of the cave, attempt to cross the bridge and a Haunting Voice will start to tell you a story, only to be interrupted by the growl of The Raptor. When you have crossed the bridge, head East and speak with th The Raptor. He will claim that it is too late to save Waylan and that you cannot stop him. The Haunting Voice wil then gather the men of Rimmington to hear her story. Follow both the Haunting Voice and The Raptor deeper into the cave.
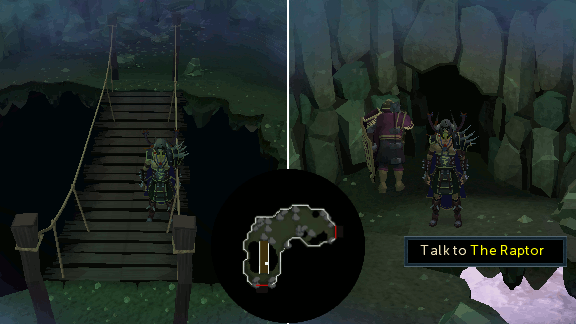 Image last updated: May 22, 2018 Update Image?
-
You will find yourself in a maze of rooms, each containing 4 doorways. The Haunting Voice will begin to sing an old mermaid song with hidden clues to guide you through the maze. Go through the doorways in the following order: North, West, South and then East. When you have made it through the maze, go through the door up ahead and a cut scene will occur in which the souls step through a disappearing doorway.
Note: If you are not into riddles or picked a couple of wrong doorways, then simply follow the souls that wander around in the caves.
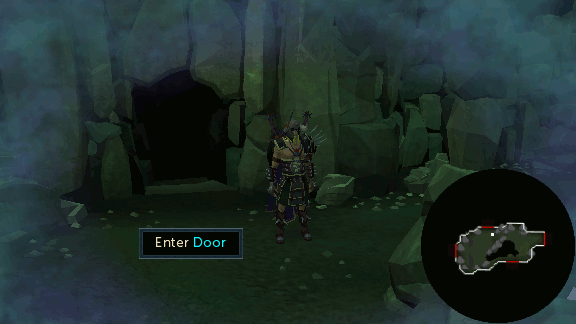 Image last updated: May 22, 2018 Update Image?
-
Once the cut scene has ended, you will come to a room where you need to discover a number of illuminating symbols to unlock the next doorway. The symbols will appear under your feet when you stand on them. You will find symbols along the Southern edge, the North-Western corner and the North-Eastern corner. Once you have discovered these 3 symbols, the bar at the top of your screen will have reached 100% and a door will appear in a random corner. Enter the next room and solve an exact same puzzle to unlock the next door. In this room you will find the symbols in the Western, Northern and Eastern ends of the room. Once discovered, a door will appear in a random corner of the room again. Go through the door up a head in the following room.
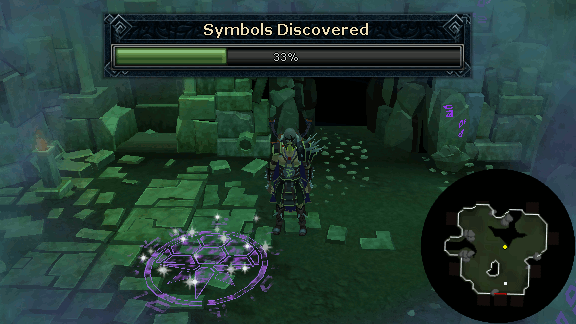 Image last updated: May 22, 2018 Update Image?
-
After a short cut scene, in which the dreaming souls travel across a chasm in the way ahead, you will be in a room with 4 plant pots and a sapling. The objective in this room's puzzle is to nourish the burning sapling back into a healthy tree using the steps below.
- Pick up the Burning sapling in the center of the room and place it in the water pot (South Western plant pot). Enter the water overflowing doorway to the North East.
- Take the now Dead sapling from the water pot and place it in the fungi pot (North-Western plant pot). Enter the fungi covered doorway to the South West.
- Take the now Budding sapling from the fungi pot and place it in the ivy pot (South East plant pot). Enter the ivy covered doorway to the West
- Last of all, take Healthy sapling from the ivy pot and place it in the with cobwebs covered pot (North East plant pot). Enter the cobweb covered doorway to the East..
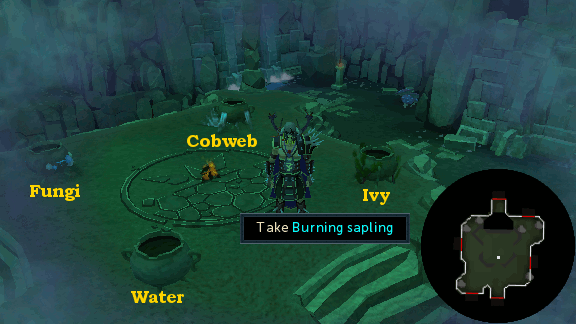 Image last updated: May 22, 2018 Update Image?
- Pick up the Burning sapling in the center of the room and place it in the water pot (South Western plant pot). Enter the water overflowing doorway to the North East.
-
In the next room, you will notice a large tree in the middle with one of its roots stretching out over a chasm. Walk across the roots and enter the doorway.
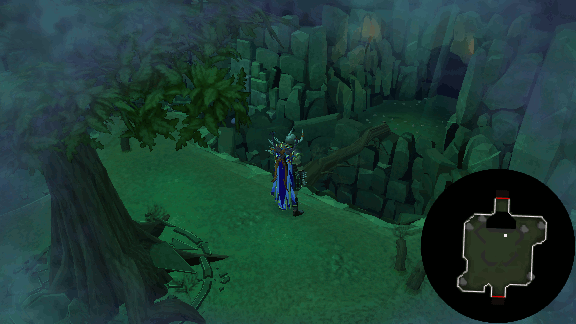 Image last updated: May 22, 2018 Update Image?
-
As soon as you enter the next room, a cut scene will occur in which the purple souls and The Raptor jump off the chasm into the dragon's mouth. Jump into the chasm after them, only to be eaten by the dragon. You will end up in the belly of the dragon. Run through the area and enter the opening, carefully avoiding the green acid pits, the Flying leeches (level 2), and the Grotworms (level 2). Do the same for the next 2 rooms.
Note: It is advised to turn auto-retaliate off in these rooms even though the monsters are not aggressive. If you step into the acid pits, you will take 49 damage and then 19 damage for every 2 seconds that you remain in the pit.
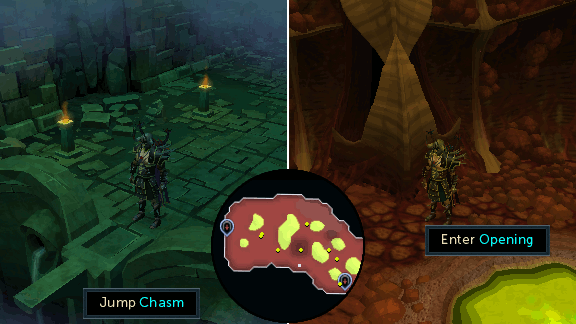 Image last updated: May 22, 2018 Update Image?
-
Eventually, you will end up in room with The Siren trapped in a sac and under the impression that she is still on her island where singing would not lure men to their death. Talk to her, in the interactive cut scene, and reply any way like to find out that her name is Remora. The Raptor will enter the room shortly after threatening to kill her. Again, reply any way you like and he will agree to let her go. Another cut scene will occur in which you pick up and fire Coral crossbow at the sac to free The Siren. This will cause the dragon to spit the 3 of you out. Once it has ended, you will be teleported out of the cave. Ask both The Raptor and the Siren if they are ok. He will then give you the Coral crossbow, 50 Coral bolts, and Remora's necklace.
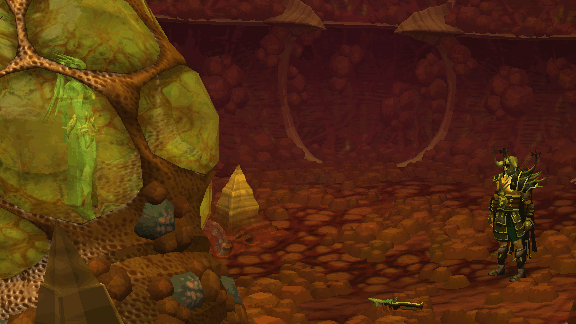 Image last updated: May 22, 2018 Update Image?
-
Return to Lucille to claim your reward
Congratulations! Quest Completed!
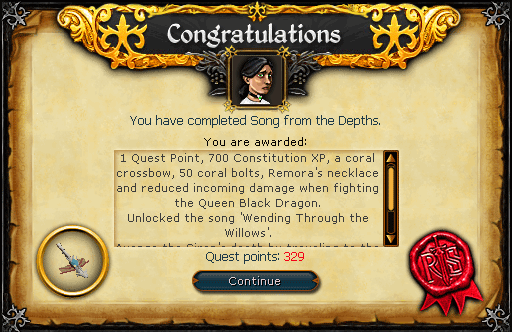 Image last updated: May 22, 2018 Update Image?
Additional Rewards:
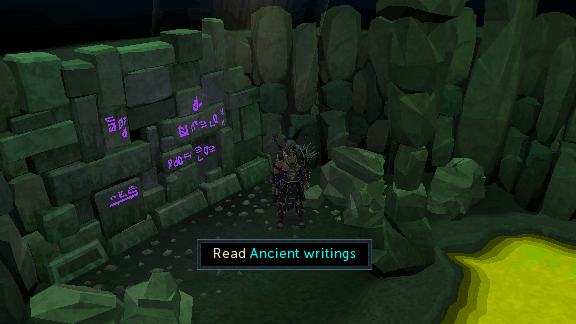
Upon completion of the quest, you can return to the cave to receive an additional 30K Constitution XP. Enter the cave to the South of the Rimmington Mine and swim across the acid pool. 50 Constitution is required to swim across and you will take 8 damage for every second that you remain in the pool. Once on the other side, go through the only door and follow the directions of the distant echoes. Take the Western door and then the Southern door. Listen to the echoes again and go through the Eastern door. Now, enter the door to the North and read the ancient writings on the wall to receive 5K Constitution XP. Swim all the way across the acid and read the ancient writings on the other side to receive 25K Constitution XP. 80 Constitution is required to swim across this pool and you will take 9 damage for every second that you remain in the pool.
Rewards
Guide Credits & History
| Writers | Tabion and Capudie |
|---|---|
| Contributors | lanka, Goku619, Double_D_Edd, Misty Fuzzy, Ikki_Fenixs, Hydromett, il hydro ilx, Keata Kat, and Alfawarlord. |
| First Uploader | Alfawarlord |
| Date Added | May 22, 2012 |
| Last Updater | DRAVAN |
| Last Updated | May 22, 2018 |
Guide Feedback
Rate this guide
You can report issues without logging in. Log in to leave ratings and watch pages.
Want to help keep RuneHQ's guides up to date?
We're always looking for knowledgeable players to write, review, and improve our content. Join the team and help thousands of adventurers.