Void Dance, A
Quest Details
| Difficulty | Experienced |
|---|---|
| Type | Quest |
| Length | Medium-Long |
| Quest Points | 1 |
| Members | Yes |
Start Point
Requirements
Skill Requirements
46 Hunter
47 Construction
47 Mining
48 Summoning
49 Herblore
52 Woodcutting
54 Thieving
Ability to kill a level 77 enemy
47 Construction
47 Mining
48 Summoning
49 Herblore
52 Woodcutting
54 Thieving
Ability to kill a level 77 enemy
Quest Requirements
Quests Unlocked/Partially Unlocked by Completing This Quest
Items Needed
Items Acquired During Quest
Walkthrough
-
Speak to Commodore Tyr located at the Void Knights' Outpost. He will tell you that the Void Knights and White Knights have so far been unable to locate the escaped Pest and require your help to find it.
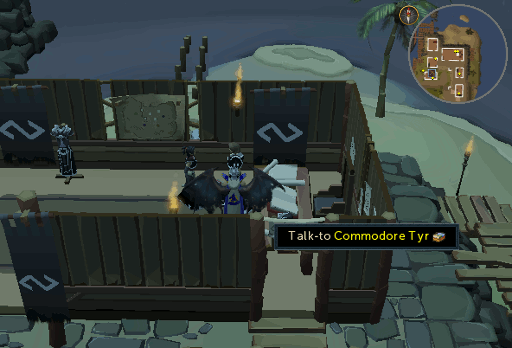 Image last updated: Jun 15, 2018 Update Image?
 -
Travel back to Port Sarim dock and speak to Captain Korasi and Jessika, they will tell you to search the local area for signs of the escaped Pest and ask the locals for help.
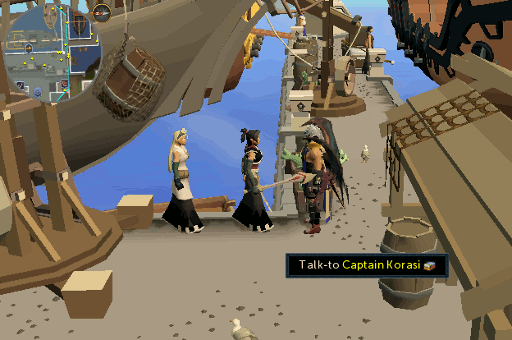 Image last updated: Jun 15, 2018 Update Image?
 - Speak to the Captain Tobias near the boat to Karamja and ask him if hes seen a Pest causing trouble, unfortunately he hasn't but he suggests you go to the local Fishmonger (Gerrant) as he was last known to complain about a Pest. Speak to Gerrant in the Fishing Store and ask him about the Pest, he will thank you for trying to recapture it and tell you he last remembers it West of his shop.
-
Head west of the Fishing store and search the local plants, rocks and bushes until you find purple tracks and follow them by uncovering more along the way. The trail will finally end behind the Pub in Port Sarim. Search the mound for evidence that the trail belonged to the Pest.
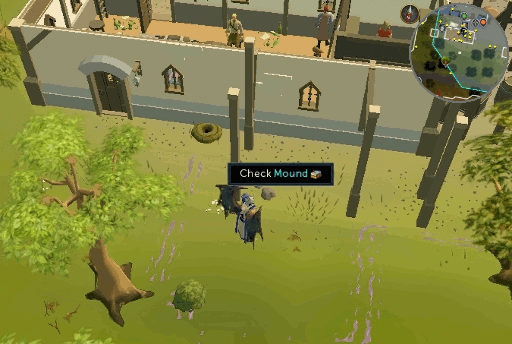 Image last updated: Jun 15, 2018 Update Image?
 -
Head back to Captain Korasi and Jessika to inform them of your findings. They suggest you speak to the Landlord of the Pub to gain access to the cellar of the pub. Head back to the Pub and speak to the Bartender, he will give you permission to access the cellar provided you can find the lost Broken anchor cellar key. Search the Junk piles until you find it. Enter the cellar through the trapdoor in the northwest corner of the pub, Captain Korasi and Jessika will now join you.
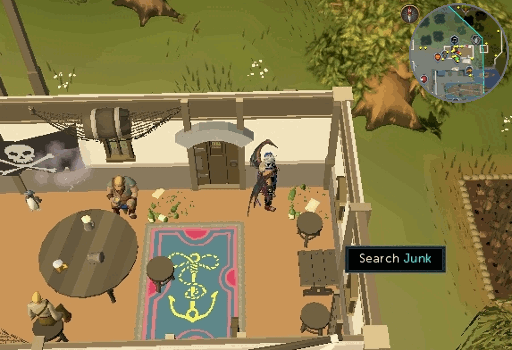 Image last updated: Jun 15, 2018 Update Image?
 -
Speak to Jessika near the crack in the wall, she will ask you to investigate it. Use your pickaxe to make the crack wider, you will discover that the same purple goo you followed flowing out the crack. Jessika suggests you take a sample of it, and asks you to collect an empty Barrel from the storeroom.
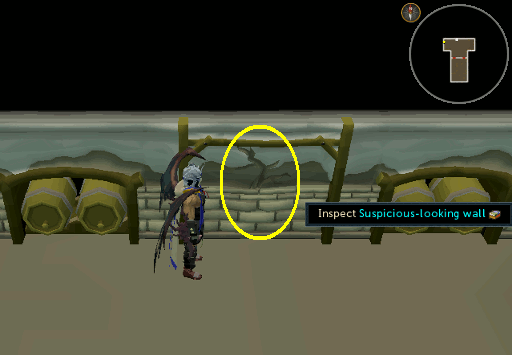 Image last updated: Jun 15, 2018 Update Image?
 -
The aim of the puzzle is to make the empty barrel back out to Jessika. You must kick the full barrels around to enable you to kick the empty barrel out the room. You will be given a Void knight whistle to aid you with resetting and undoing moves. Once you have kicked the Empty barrel through to Jessika and Korasi and leave the storeroom. They will ask you to create a cover story for the Bartender while they think off what to do next.
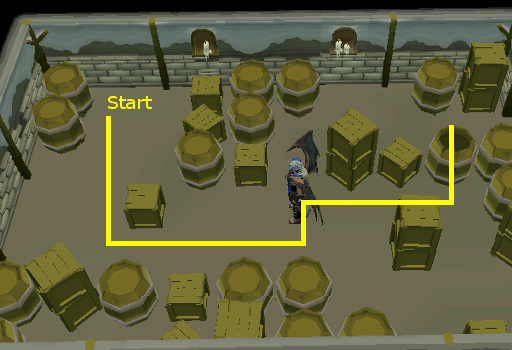 Image last updated: Jun 15, 2018 Update Image?
 -
Speak to the Bartender and create a subtle lie to throw him off the trail your following. Head back to Korasi and Jessika at Port Sarim dock. They will reach the conclusion that the Pest may have escaped to Karamja/Musa Point. Travel to Karamja with the boat at Port Sarim. Upon arrival talk to Jessika and Korasi and they will suggest you ask the locals for help.
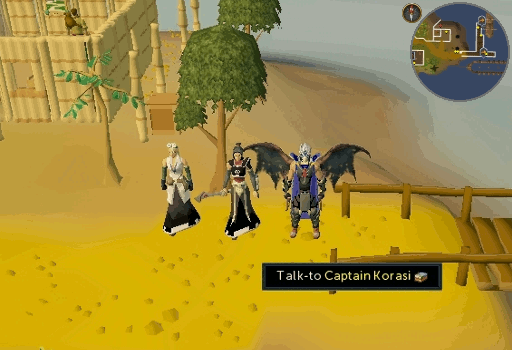 Image last updated: Jun 15, 2018 Update Image?
 -
Speak to Zambo in the Pub and ask him if he's seen anything odd lately. He will tell you that Shopkeeper Kofi had trouble with a scorpion a few days ago and is now ill. Head over there to find out more. Kofi is reluctant to help you unless you repair his shop wall. Head to the southern part of the shop and take the necessary supplies from the table. Use the Chisel on the Logs and Plank to create a jointed log and jointed plank. Use them on each other to create a joist, then use this on the north wall to repair it. Return to Kofi and he will show you another trail of the purple goo.
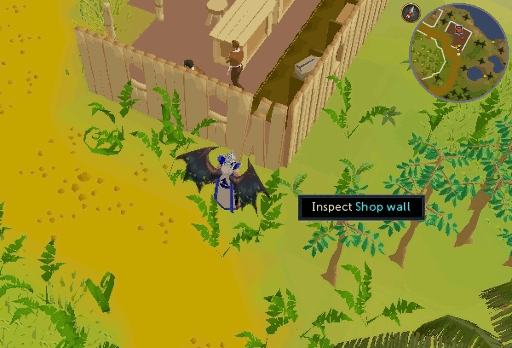 Image last updated: Jun 15, 2018 Update Image?
 -
Follow the trail again, you should finally end up inside the south west side of the banana plantation. Search the mound and Korasi and Jessika will appear. You will discover someone has already taken the Pest and you must now search inside to find out any clues as to who or what did it. You will obtain some wood shards made of waxwood while searching the mound. They suggest you head to Rimmington and speak to Rommik, the Rimmington craftsman.
Note: Make sure you have 16 empty inventory slots before proceeding to the next step.
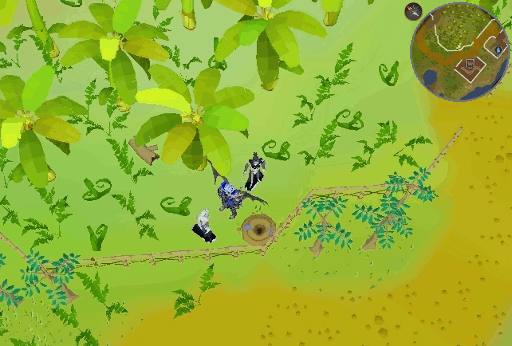 Image last updated: Jun 15, 2018 Update Image?
 -
The Craftsman will identify the Wood shards from that of a delivery box. Head over to the Chemist in Rimmington to report to Korasi and Jessika. They will ask you to aid them in their efforts to identify the goo. The Chemist will ask you to analyze the samples. The process is similar to that of distilling coal. All the information you need to know is explained before you start the analysis. Once distilled the Chemist will discover that the Pest is draining life from anyone nearby in order to feed itself. Jessika will offer you a teleport to Falador to stop the outbreak as soon as possible.
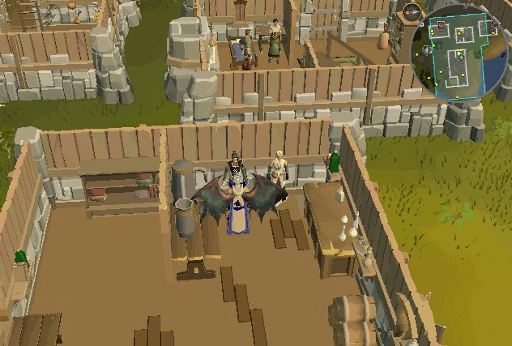 Image last updated: Jun 15, 2018 Update Image?
 -
Speak to Sir Tiffy Cashien and quickly brief him on your progress. He will inform you that people around him have recently been affected by the same draining illness after acquiring some waxwood boxes. Head over to Ali Tist's stall located south of the Falador east bank. Ali will attempt to offer you a box with a puzzle lock mechanism for 5 coins. Accept his offer and attempt to unlock the box to obtain the prize inside. You will fail, so take it back to Korasi and Jessika who will crack it open with a sword and discover some goo inside.
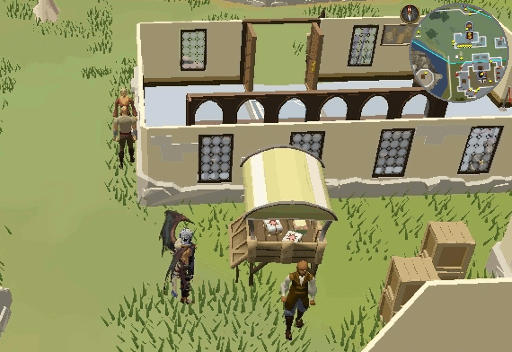 Image last updated: Jun 15, 2018 Update Image?
 - Head back to Ali Tist and confront him about the goo. He will refuse to give you any information so head back to Falador park for help. Sir Tiffy Cashien will suggest you speak to Sir Amik Varze in Falador Castle. Sir Amik Varze will provide you with a warrant to search Ali's goods.
-
Head back to Ali's stall and demand to see his goods and you will discover a mysterious clue scroll. Take this back to Jessika and Korasi. They will suggest you follow the clue and give you a Commorb to stay in contact. The first part of the clue contains a picture puzzle and the location is south of the wheat field that can be found west of Falador, south of Taverley and north of Nora T. Hagg's house.
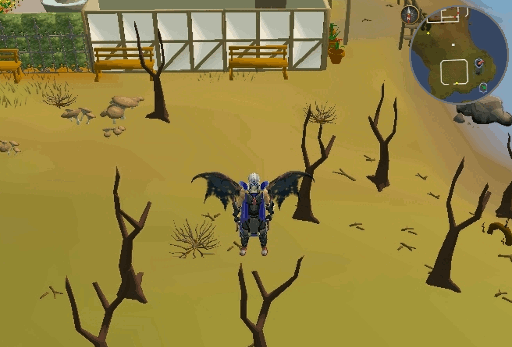 Image last updated: Jun 15, 2018 Update Image?
 -
Head to the location and dig on the east side of the central dead tree. You will now receive another clue which reads "South of a city and east of a guild, there wanders a fellow whose path went astray. Hand him an onion and give him a wave, if on track for treasure you're wishing to stay." Walk east of Melzar's Maze in Rimmington and pick an onion in the patch. Find the Man wandering around east of the Crafting Guild and use an onion on him, then wave.
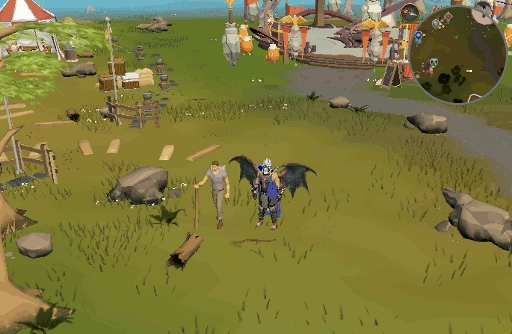 Image last updated: Jun 15, 2018 Update Image?
 -
You will receive another clue reading "Check a crate in the farmhouse west of the Falador farming patch." Go inside the farmhouse south of Falador and search a light brown crate in the largest room of the house. You will receive another clue and speak to Korasi via the Commorb.
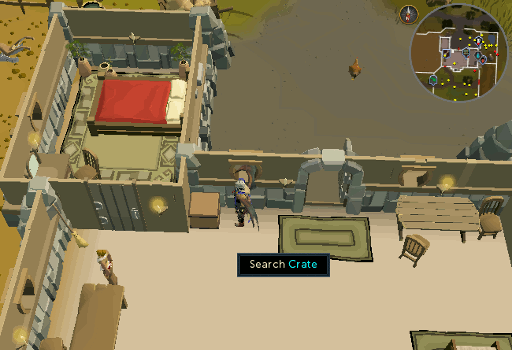 Image last updated: Jun 15, 2018 Update Image?
 -
The new clue reads "Splash of red in a holy bed; lies north of its fountain, east of Ice Mountain. Its three closest neighbours have petals of blue; just dig where it's planted to find your next clue." The location of the clue is the Monastery north of the eastern fountain. For easy access, use a Combat bracelet to teleport to directly to the Monastery or walk from the Edgeville lodestone.
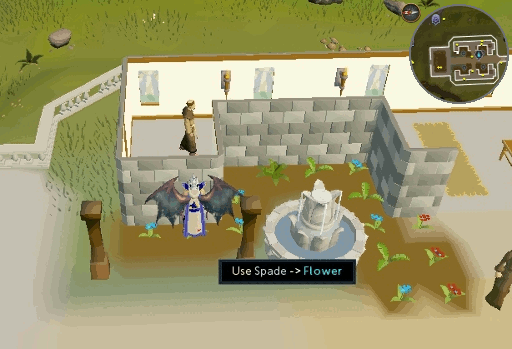 Image last updated: Jun 15, 2018 Update Image?
 -
After digging on the red flower, you will receive a coordinate clue reading "11 degrees, 9 minutes north 17 degrees, 56 minutes east" which is a hatch entrance south of the Black Knights' Fortress. Korasi will then contact you and teleport with Jessika beside you. Now would be a good time to equip your good armor/weapon(s) and bring some food. Leave some space for the next few items you will obtain though.
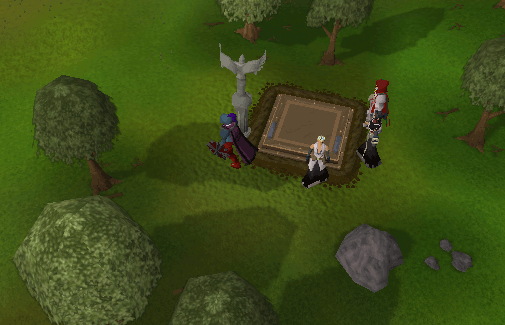 Image last updated: Jun 15, 2018 Update Image?
 -
Enter the hatch and you will find yourself in another puzzle room. You will need to gain access into the next room by placing a Void drone 'bug' close to the door so it can record the secret password. Talk to Jessika about the 'bug' and she will summon a tiny bug for you to pick up. Place it inside the low box west of the door and hide. Once a worker arrives at the door a cut scene will take place. Once he's gone, take the 'bug' out again and take it back to Jessika who will uncover the password. However she will require identification to gain access. Pickpocket one of the workers heading away from the door for a black knight access insignia. Head over to the door and knock on the door.
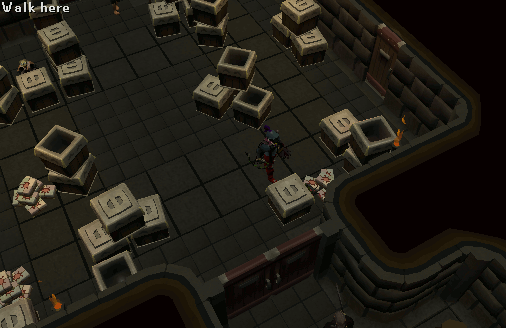 Image last updated: Jun 15, 2018 Update Image?
 -
Once you gain access into the next room you will ambush the guard. You can either tie him up or kill him.
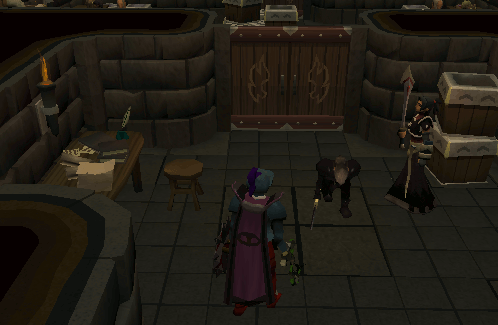 Image last updated: Jun 15, 2018 Update Image?
 -
Head into the next room and kill one of the workers to obtain a black knight workshop key. Alternatively, you may search the nearby workbench for a tool, use the tool on the 3 other workbenches and fix together a long pole and hook that will allow you to gain the same key from the top shelf. After you have obtained the key, use it to gain access to the next room. Once you enter you will notice two Black Knight Guardians, level 77 and 110. You'll begin to fight the level 77 Guardian. Once you have killed it, speak to the pest inside the cage to find out why it was wreaking such havoc. You can then decide to set the pest free or destroy it. Jessika and Korasi will then offer you a teleport back to Pest Control to report back to Commodore Tyr.
Note: It is advised that you enter the area with the two Black Knight Guardians with your Prayer points drained to zero and a good amount of food. If you still have some Prayer points left upon entering, then the Black Knight Guardians will drain your Prayer points and used them to heal themselves.
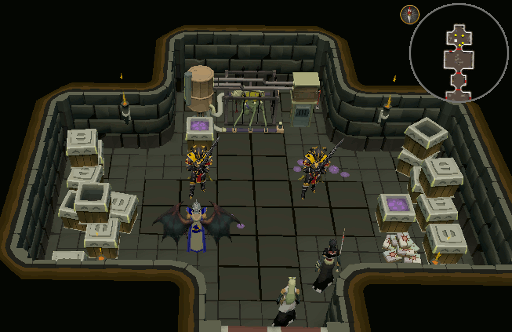 Image last updated: Jun 15, 2018 Update Image?
 -
Once you brief Commodore Tyr on what you have discovered, you will be happy to find out that Korasi will be helping Jessika enlist into the Void Knights.
Note: You can turn in your commendation slip to one of the knights to receive your 50 Pest points.
Quest Completed!
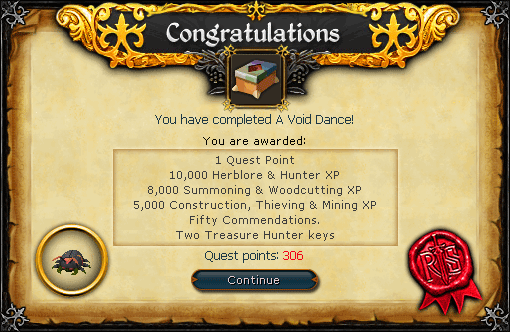 Image last updated: Jun 15, 2018 Update Image?
Rewards
50 Commendations, 10k Hunter and Herblore XP, 8k Summoning and Woodcutting XP, 5k Thieving, Construction, Mining XP, and 2 Treasure Hunter keys.
Guide Credits & History
| Writers | Heavens_Vibe |
|---|---|
| Contributors | Jakesterwars, ThomasRM, Alerow, Yeldarb12, Sir_Bob126, MerchMaster, High Vortex, and AmeriCorps |
| First Uploader | Im4eversmart |
| Date Added | Aug 10, 2010 |
| Last Updater | Ksb Single |
| Last Updated | Jun 15, 2018 |
Guide Feedback
Rate this guide
You can report issues without logging in. Log in to leave ratings and watch pages.
Want to help keep RuneHQ's guides up to date?
We're always looking for knowledgeable players to write, review, and improve our content. Join the team and help thousands of adventurers.