Deadliest Catch
Quest Details
| Difficulty | Master |
|---|---|
| Type | Quest |
| Length | Short |
| Quest Points | 1 |
| Members | Yes |
Start Point
Requirements
Items Needed
Items Acquired During Quest
Walkthrough
-
Speak to Jones outside the bank in the Fishing Guild. He will tell you that he and "Betsy" (his trusty fishing rod) are tired of the hard life with little reward and have thought of a better route to fame and fortune. He proceeds to tell you about the sea monster known as 'Thalassus'.
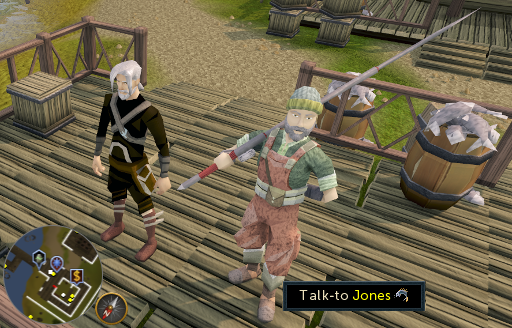 Image last updated: Jun 12, 2018 Update Image?
 -
He requires help with three things before he can start the journey to catch the sea monster. These are:
- An extra rower - Your expertise is required to help in the hunt, so another pair of hands is required for rowing the boat.
- A giant harpoon - As this is not a normal-sized creature, a normal-sized fishing harpoon just won't do.
- A particular sea chart - This chart shows the wrecks attributed to Thalassus and is needed to find its location.
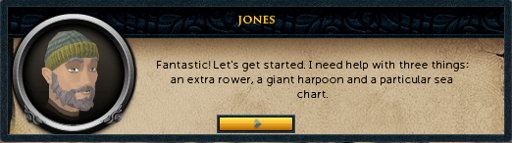 Image last updated: Jun 12, 2018 Update Image?
 -
Ask about each of the things that are needed:
- You will be told that the Sea chart is owned by the Master Fisher, but that he guards its secrets closely. You will have to get it dishonestly.
- When you ask about the Giant harpoon you will be given a set of Harpoon plans. These plans will need a Master Smith to accomplish. Jones doesn't know a Master Smith, but tells you to ask the Master Fisher located near the entrance to the Fishing Guild.
- For the extra rower you'll be told about his cousin who likes to go by the name of 'The Guns'. This is the builder at the Tower of Life who loves to pump... wood.
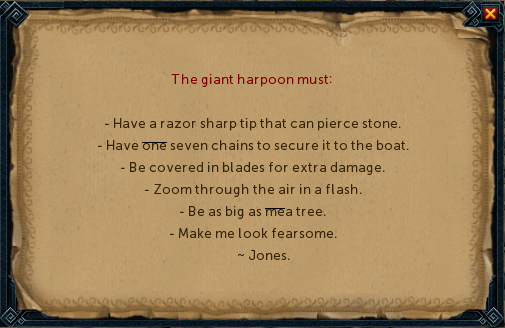 Image last updated: Jun 12, 2018 Update Image?
 -
Head to the Master Fisher near the entrance of the Fishing Guild. Ask him about a Master Smith. He will direct you to Linza in Hemenster.
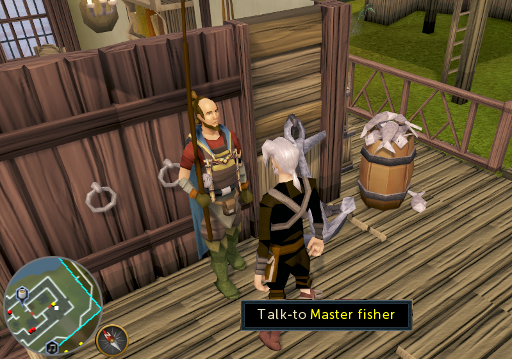 Image last updated: Jun 12, 2018 Update Image?
 -
Before you leave pickpocket him for the Sea chart. You can try reading this chart, but it makes no sense to you and you show your confusion with words and actions.
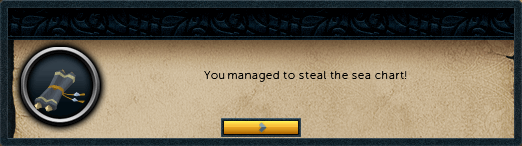 Image last updated: Jun 12, 2018 Update Image?
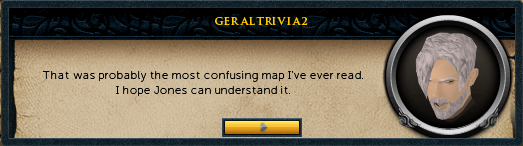 Image last updated: Jun 12, 2018 Update Image?
 -
Head off to speak to Linza. She is found at the anvils outside of her house, in Hemenster. This is a little to the east of the Fishing Guild. Head out of the gates, and follow the fence around and north to the anvil icon on the minimap. Once you get Linza's attention with the goal of your mission she will agree to help you, in return for a tooth from the Thalassus. There is a short cutscene as she makes the fearsome looking Giant harpoon and hands it to you.
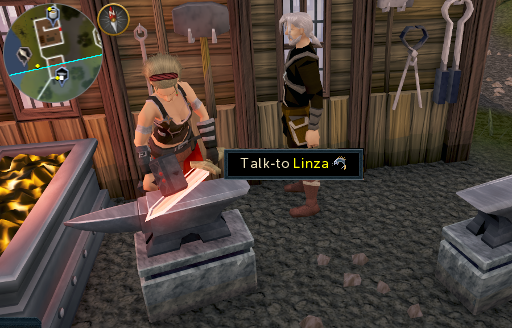 Image last updated: Jun 12, 2018 Update Image?
 -
Now it's time to travel to the Tower of Life and speak to 'The Guns'. He's only too happy to help, but he gets seasick. There is a potion that worked to cure it in the past, and he tells you how to make it. You need to get hold of some Lowland heather and Builder's tea.
 Image last updated: Jun 12, 2018 Update Image?
 -
The Builder's tea is easy to get, just talk to the foreman, Bonafido, and he will give you a flask full of it. He's relaxing near the entrance of the Tower of Life.
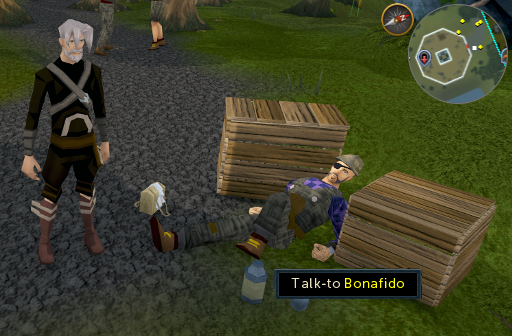 Image last updated: Jun 12, 2018 Update Image?
 -
The Lowland heather has to be picked from a patch surrounding the Tower of Life. It's easy to spot and looks like pale flowers. All but one of the patches are infested with aphids, not nice for something that is going to be consumed. The only plant that can be picked is on the east side of the tower.
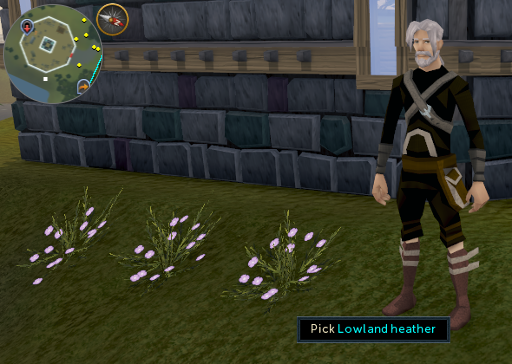 Image last updated: Jun 12, 2018 Update Image?
 -
Once you have both the Lowland heather and the Builder's tea you can combine them to make a Sea legs potion. Go back and talk to 'The Guns' again. He will teleport you both back to the Fishing Guild, next to Jones. Talk to Jones to continue the quest.
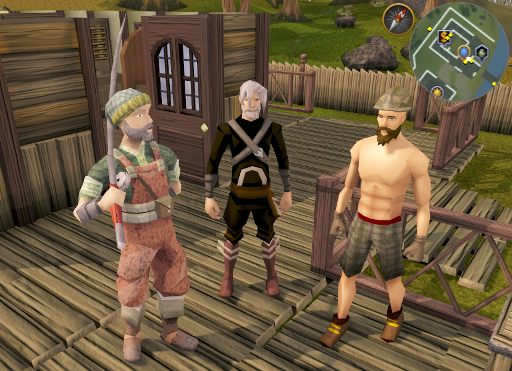 Image last updated: Jun 12, 2018 Update Image?
 -
When you decide to set off on the hunt the scene will cut to a small rowing boat in a large ocean, scattered with the debris of several ships. You are told that it's time to track the movement of the Thalassus and that you may find a small amount of treasure among the wreckage as you search.
Note: You can only choose three loot items and normally stackable items shown separately won't stack with each other, but you can return items from your selection to any wreckage if you find something you like more.
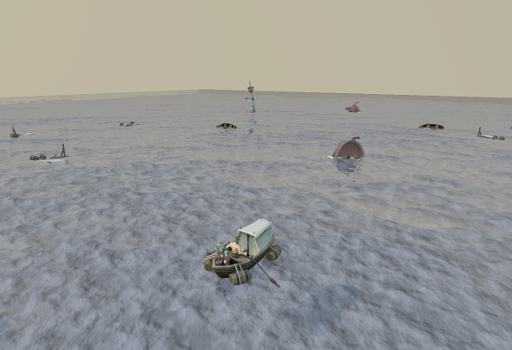 Image last updated: Jun 12, 2018 Update Image?
 -
You'll see a minigame interface when on this part of the quest. The interface has a bar and three buttons.
- Curiosity bar - This fills up as you make wrong moves while tracking the monster.
- Left button - Instructions and help on how to go about tracking the monster.
- Middle button - Click this to view the loot you have decided to keep so far.
- Right button - This option will return you to the Fishing Guild if you want to continue the quest at a later time.
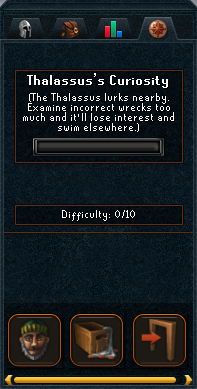 Image last updated: Jun 12, 2018 Update Image?
 -
To begin the hunt, 'Investigate' the wreckage indicated by the flashing arrow. The hunt proceeds like tracking a hunter monster, with paw prints replaced by a trail of debris. The 'curiosity bar' fills up a bit if you investigate the wrong wreckage and if it fills up completely you have to start from the beginning again. A good memory helps here as the path remains the same each time.
Note: All wreckage but the one indicated at the start also has the 'Loot' option to check out the treasure it contains. Each wreck can only be searched for loot one time. As you close the interface it 'sinks' to the ocean floor. Looting doesn't effect the 'curiosity bar'.
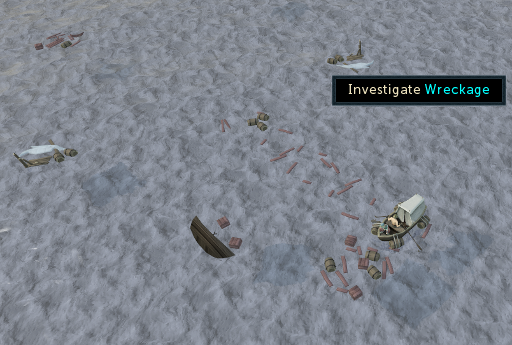 Image last updated: Jun 12, 2018 Update Image?
 -
You will eventually find the end of the trail and a cutscene will ensue where the sea monster makes it's appearance. The harpoon is launched at the beast which enrages it and poor Jones gets a visit to the monster's tummy!
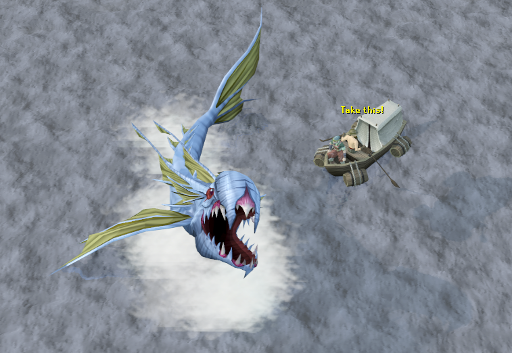 Image last updated: Jun 12, 2018 Update Image?
 -
You end up shipwrecked on an island. On this island there are three mermaids. They tell you about how the Thalassus is protecting them by keeping the fishermen away, and are hostile to the thought of anyone harming it.
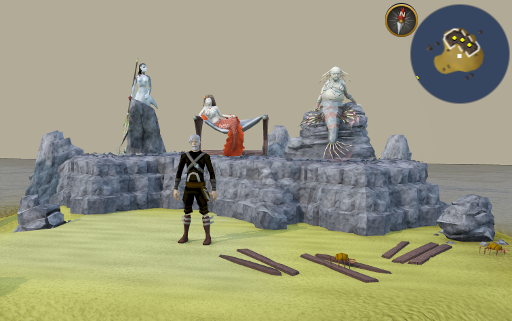 Image last updated: Jun 12, 2018 Update Image?
 -
The next thing you need to do is convince the confident and rather mean mermaids that Jones is a legend among fishermen and will kill them, once he's finished off the Thalassus from the inside, that is. Choose the following options in the conversation that follows:
- The Thalassus has eaten Jones the mighty fisherman.
- It should. He's been hunting for decades.
- Very horrid! After the Thalassus, he'll probably come after you.
- Trust me, I'm a great adventurer, I should know.
- Did I mention Jones has a harpoon with him?
- It's no ordinary harpoon.
-
The mermaids will become scared as they begin to believe you and will eventually offer to help by making the Thalassus sick. The scene cuts to the wreckage once more and the beast has to be tracked and found again. Follow the same steps as before to find it. The trail will be different from the first one, but will remain the same path if you have to restart it. When you find the monster for the second time there is a cutscene where you throw it some karambwan. This makes it sick and he spits out Jones, safe and sound.
Note: You can get another three loot with this hunt as it is a new trail to follow.
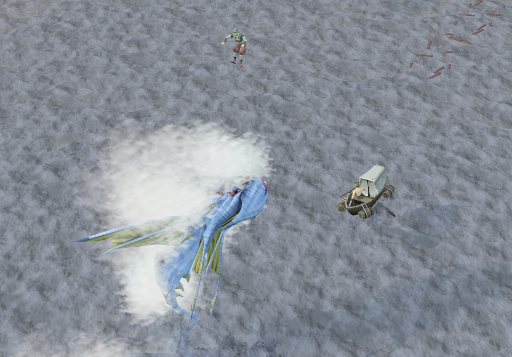 Image last updated: Jun 12, 2018 Update Image?
 -
After the scene cuts back to the Fishing Guild you can talk to Jones about the adventure. He gives you a Thalassus tooth. Take the tooth to Linza at Hemenster before returning to Jones to claim your reward.
Well done! Quest complete!
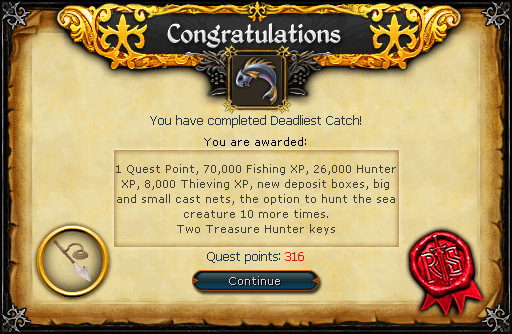 Image last updated: Jun 12, 2018 Update Image?
After The Quest
Deposit Boxes
There are several deposit boxes unlocked around the map. Talking to Jones will give you an option to visit the RuneScape Knowledge Base page which lists the locations. The locations are as follows:
- Piscatoris - Just to the south of the Falconry enclosure, by the water's edge.
- Elf Camp - South of the camp, west of the logs across the river.
- Ape Atoll - South of the dungeon entrance on the southern part of the island.
- Bedabin Camp - Northwest corner of the camp, at the water's edge.
- Pollnivneach - Northeast corner of the large mansion on the east of town.
- Brimhaven - On the coastline just north of the musician and general store.
- Harmony Island - Northwest of the windmill, at the water's edge.
- River Salve - Mort Myre swamp, west of 2 fishing icons and south of dense weeds.
Hunt Again?
Not seen enough of the legendary beastie? You can go and hunt for Thalassus amongst the wreckage another 10 times for experience and loot. The Hunter experience rewards for catching Thalassus after the quest are:
- 2510 XP
- 2990 XP
- 3470 XP
- 3950 XP
- 4430 XP
- 4910 XP
- 5380 XP
- 5860 XP
- 6340 XP
- 6820 XP
Cast Nets
The cast nets are wieldable fishing nets than can be regained from Jones at any time.


Rewards
Guide Credits & History
| Writers | Vane and Bob. |
|---|---|
| Contributors | kassandra, DarkBlitz, Z A D Y, and GeraltRivia2 |
| First Uploader | Greg |
| Date Added | Jun 08, 2011 |
| Last Updater | Ksb Single |
| Last Updated | Jun 12, 2018 |
Guide Feedback
Rate this guide
You can report issues without logging in. Log in to leave ratings and watch pages.
Want to help keep RuneHQ's guides up to date?
We're always looking for knowledgeable players to write, review, and improve our content. Join the team and help thousands of adventurers.